Thursday, October 31, 2013

Fear Fabric Challenge reveal!

Happy Halloween! In honor of this scare-tacular month, I'm hosting the first annual Fear Fabric Challenge! Myself and some other lovely lady bloggers accepted the challenge to sew with a fabric that scares us. Make sure to pop over to the other blogs to see what fears have been faced!


Andrea from foursquarewalls worked with lace.
Sally from the quirky peach sewed up leather.
Mrs. Smith from The joys and trials of my sewing and crafting! tried her hand at silky fabrics.

And I tackled my fear of brocade!


Please bear with the photos. I would have loved some outdoor fall photos, but it's been dark, gloomy, and rainy here (trick-or-treating has even been officially moved to tomorrow!). I promise there are close-ups that prove this is more than a plain black skirt!


Brocade used to scare the crap out of me. It's textured, it has weird and often (in my opinion) ugly prints, and it seems like it is only used to make jackets. I think I spent more time obsessing and planning (thank you Sewist's Notebook) than actually sewing. I must confess, I'm now totally converted! You have to get pretty close to see the texture of this fabric. It's a polyester brocade, black on black, from Mood (more here!). It took me a while to find a brocade I liked, but this was exactly what I wanted.


This is a close-up of the design. It's called a "medallion floral". I'm very glad I ordered from Mood. I can't attest to anyone else's quality, but this brocade was medium weight but still had a nice drape. I was pleasantly surprised by how nice it is. I decided on a skirt because I wanted to use the fabric in a small-dose kind of garment, and I chose a pattern with very simple lines.


I made View E, but without the pockets. It's a basic A-line skirt with a waistband. Originally, I wanted to add a full lining, but I wasn't loving it and halfway through abandoned that idea. The quality of the fabric was good enough that it wasn't unraveling like mad, so a lining didn't seem as necessary. I did make a muslin since this was my first time sewing this pattern, but it turned out the size 4 fit almost perfectly without any alterations (maybe needed just a teensy bit extra space at center back).


I had read that brocade can fray easily, so I cut 1" seam allowances instead of the 5/8" included in the pattern. I think that was a good idea when it came to the vertical seams, but in the waistband area it was maybe not so smart. The extra-large seam allowance made it more difficult to ease the waistband to the top of the skirt, and also the facing into the waistband.


The pattern calls for a center-back, lapped zipper, but I put in an invisible zipper. This is only my second invisible zip, and look how nice it looks (above)! I'm super happy with it. I sewed it twice to make sure it was invisible-ish enough (I don't have an invisible zipper foot). Next time I might put it in the side seam so it's easier to reach.


The facing fabric is leftover crepe-backed satin from AB's flower girl dress. So soft! The color is a little off in the above photo, the bottom one looks more true-to-life. I used the Coletterie method for sewing on the facings so that I didn't have to slipstitch to the zipper. The bottom edge of the facing is finished with rayon seam binding.


The hem is finished with bias tape. I've pressed the blankity blank out of it but it's still a bit wavy. The brocade was pretty hard to press, being thick and polyester. I serged all the seams to finish them. And yes, I used gold thread because that's what was already on my serger. I wanted to finish the seam allowances in a fancier way than that, but everything else I tried was creating too much bulk.

Like my sweater? I'm selling it here.

Some other tips for working with brocade:

--use a fresh needle
--if you're having trouble marking, try thread-tracing (basting the outline of the pattern piece onto the fabric), tailor's tacks, or soap slivers
--staystitch to prevent stretching
--reinforce high-stress areas like zippers
--use a press cloth to protect the raised motifs
--if your fabric unravels easily, consider underlining

I MIGHT redo the side seams of this skirt into a pencil skirt, instead of A-line. Can't decide now that it's done. I think there is actually some spandex in the fabric, even though it wasn't stated online, so it may work in a tighter silhouette.

I had fun conquering my fear and adding another fabric into my repertoire. Make sure to check out the other blogs and see the results of the challenge! 

Wednesday, October 30, 2013

What I'm Reading: Easy Guide to Sewing Skirts

Sometimes you need a book that specializes in one thing. Pants (like when you're making Thurlows), or special occasion dresses (like a flower girl dress), or maybe skirts.


This is a compact little book all about skirts. Need help with construction order?


Boom. Can't figure out a lining?


Boom. There's even a section on how to choose the right silhouette for your body.


In short: read this book if you make a lot of skirts. There's help with pockets, pleats, gathers, hems...all of it! It's written by Marcy Tilton, an authority in the sewing world and frequent Threads contributor. In fact, try to find the whole Sewing Companion Library if you can!

Tuesday, October 29, 2013

Halloween costume: part two

Soooooo...I lied. I wasn't done with Halloween costuming. I honestly thought I was over it, but then I got really inspired by some cute My Little Pony stuff I saw on Zulilly last week (yes, more My Little Pony, or "monies" as AB calls it). My biggest issue with Halloween has been AB's reluctance to wear even regular clothes, much less a costume. I realized that it wouldn't be too difficult to convert a hoodie into a pony costume, and hopefully she wouldn't pitch much of a fit at a hoodie.


This costume is based on the Hangout Hoodie pattern from Peek-a-Boo Pattern Shop. Love that pattern, even if I can't sew the placket on the front evenly if my life depended on it. I added a ruffle/peplum simply because I didn't have enough fabric to make the hoodie long enough.


The mane is sewn into the center hood seam, and the ears into the seam between the band and the hood. The white part of the ears is bamboo double french terry (say it with me..."oooooo!").


The pants are RTW and frankly are a size too small. I serged the ends of the tail pieces together, and then loosely sewed them into the pants (for easy removal later). All the rainbow pieces are fabric scraps. I didn't buy anything new for this project, which was pretty satisfying. Oh wait...you're not familiar with My Little Pony and have no idea what this costume is? My bad.


This is Rainbow Dash. You see it now, right? I had all these plans to add wings, etc. but it turns out...AB hates this costume, too.

"I hate this on my head!"

"Get it off!"

"Waaaaaah!"

And finally, a pony impression.

I REALLY hope next year's Halloween is more enjoyable, and that AB gives a crap. I mean, even one of dogs is getting in on the fun:


He managed to bust a few of his staples. No surprise, it's impossible to get an active German Shepherd to take it easy. Now his leg is splinted--he can be a pirate for Halloween!

I can't believe I made two costumes that AB hates. She's lucky she's so gosh-darned cute no matter what she's wearing. For once I can't wait to get a holiday over with!

Monday, October 28, 2013

Mend It Monday: Fixing a Sock

Happy Monday! Okay, Mondays aren't happy, I get it. But I'm happy, because my husband is home safe and sound from Europe, and my doggy is on the mend, and it's back to business as usual around here. Which means, mending!

How many socks do YOU have with holes? I have a ton.


This weekend, I decided to try mending one. I have so many scraps of knit fabric, I figured why not try?


I chose a French terry scrap, because it had a similar heft as the sock. I cut a small piece (making sure the stretch went in the same direction as the sock) and then placed it inside the sock, with the terry side facing out. Moving the rest of the fabric out of the way, I used my zig-zag stitch to secure the two together around the hole (you could also sew by hand if the hole is too awkward to reach by machine).

Patch, outside of sock.

Patch, inside of sock.

Then I trimmed close to the stitches and removed the excess from the scrap. Just to be safe, I went around it one more time, around the edges of the scrap itself.


Is it super pretty? No. But it's just a sock. And now it has new life!

Have you ever mended a sock? I'm tempted to go through my hole whole drawer and fix all my socks, now that I know how easy it is!

Saturday, October 26, 2013

Craftsy Education Series

*This is a sponsored post, however my love for the Craftsy platform is real! See my previous reviews of their classes here and here. This post contains affiliate links.


What is Craftsy?
Craftsy is a worldwide craft community offering online classes. It also has a patterns marketplace where independent designers can sell their patterns; a supplies shop with great deals on yarn, fabric, and class kits; and a projects section where members share pictures of their latest craft successes. With over two million members and counting, Craftsy has something for just about everyone, in categories ranging from quilting, sewing, knitting, painting, photography, cooking, and more.

Why should I take a class online?
Online education isn’t just for schools and universities anymore. Craftsy courses provide you the convenience of a world-class instructor in your home, whenever you want to learn. Online education, no matter what subject, is a great alternative to in-person classes for a number of reasons.

With many online learning opportunities being on-demand, you are able to learn at your own pace, anytime. Online learning is a fantastic alternative to in-store craft classes for people with busy schedules or who have difficulty leaving the house. It also allows you to watch a troubling section over-and-over again, so you can see exactly how a technique is carried out, or refer back to your class for relevant concepts before beginning any new projects.

    Want to try a free class?

Friday, October 25, 2013

Project Runway All-Stars rehash!

TGIF! My poor doggy had to get 7 staples in his leg at the vet today. He's a tough boy though, he seems to be recovering well. And my husband will be back tomorrow!!! This has been a long week. I did manage to squeeze in All-Stars this morning and I'm here with my recap!


I have a feeling I might not be able to be objective this season (wait...do I have to be??). I have strong feelings about most of these contestants based on their previous work. I guess that's not terrible. It just makes me invested in this season a lot already!

Spoilers ahead...

Things I loved:


No more what's-her-face host! Alyssa Milano is an actual real human with a personality.

I don't like Elena...but I was happy for her win. I'm not sure she deserved it, considering the best part (the reversed jacket) was her model's idea. At least we don't have to listen to her talk about never winning before!

Things I hated:


Elena over-designing from the first second. Did she learn nothing?!

I miss Joanna Coles, although Zanna seemed spot-on with the tiny amount of words we heard her say.

I don't like too many designers from the same season. Elena, Christopher, Melissa and Daniel? Did we really need all four of them to round out this season?

Favorite garment(s):


Loved Seth Aaron's and Ari's, even though Ari's wasn't punk at all. I was surprised to see her go so soon (although I would have been minorly devastated if Viktor had been out). I cannot believe how detailed and expensive Seth Aaron's looked given the amount of time he had. Also liked Jeffrey's from an it's-so-pretty standpoint.

Least favorite garment:


Hated Irina's. But I also hate her...so there's that.


Best line of the night:


"When she [Melissa] took the jacket off, she'd really thought about the dress." --I LOVE Georgina, but, uh...Melissa TOLD you that she literally draped, cut, and sewed the dress right around her model. How much thought could have gone into that?


I'm excited about All-Stars but really hope it focuses on someone other than Elena. Or Daniel. I haven't had enough time away from them yet (and I LIKE Daniel!). Did you watch the premiere or do you skip All-Star seasons?

Project Runway rehash: reunion episode

Do you ever have those days where you look at the clock and are like "it's only WHAT time?!"? Yesterday was one of those days. Just when AB and I were going to settle in for the night, I let our dogs back in the house and discovered one of them had blood on all of his paws. Half an hour later I had finally found the source (a cut on his leg) but man...wrangling a 75 lb. German Shepherd while distracting a toddler is no fun.

And of course our pets are always ill when our vet is closed.

I think you can understand why I only managed to watch the reunion special before happily surrendering to the inside of my eyelids. Don't worry, I'll gladly catch up on the first episode of All-Stars and rehash it later today. Meanwhile I'll be at the vet. Oh and it snowed yesterday. Blah.

Things I loved:


Tim Gunn hosting.

For some reason, I loved Sandro's rant about Zac Posen. It made NO SENSE but isn't his accent lovely?

Ken admitting that he should have come in with a professional mindset. Not sure it will save his career, but I was glad to hear him say it.

I laughed SO hard at the swearing montage at the end.

Things I hated:


Whoever said there has been no stronger season of work. Disagree.

I didn't need a recap of Helen's menstrual cycle. Kthanksbye.

Tonight's reason why I love Tim Gunn:


I'm glad he addressed the question of the show being rigged...I guess I believe him? Kate's elimination and the judges inability to eliminate Ken just bug me to death. It will be hard to reconcile those two things for a long while yet.

A Mondo shout-out! I still think he should have won Season 8.


Overall, this was one of the better reunion shows. A lot of them feel SO edited and like a waste of time.

But I'm still going to forget everything about this season.

Thursday, October 24, 2013

Halloween costume!

Are you ready? Halloween is one week away, and from what I can tell from the few sewing/fabric/pattern FB groups I'm in, not everyone has even started on costumes. To be fair, I'm only finished because AB's costume is lame and I used a previously finished dress as the base. With that glowing review, here's the reveal!


OBVIOUSLY this is a fairy princess costume. Look at that beautiful dress (blogged here), that magical fairy skirt, and those lovely wings!


She's practically glowing.

Okay, no more faking. This is (hopefully) the worst costume I'll ever make for her. Here's the deal. AB is going through a huge phase with constantly dressing/undressing/wearing 2 pairs of pants at once. We've already discussed her displeasure with having anything on her head. She wouldn't know a costume from a straight jacket. Oh, and she's too young for trick-or-treating. Soooooo yeah. Someone is feeling uninspired (me). The wings didn't turn out too badly (used tutorial here) so maybe I'll salvage those for another time.

Like last year, we'll probably only go to one event where she'll have an opportunity to wear this. She's already protested greatly over the wings. Maybe I'll pull out her Robin costume and go with that again (at least it looks like a costume!).

Next Thursday (Halloween) we'll be revealing our Fear Fabric projects, so this will probably be my only costume-related post. To make it up to you, I'll include a photo of the best costume I've ever assembled. Believe it or not, this photo is ME, 5 months pregnant, and I wore it all day at work (and won the costume contest, I might add):


Yes, that is a mullet wig. And a rope belt. And I drew on a mustache with eyeliner. Good times.

Where are you in the Halloween costume assembly process? Before, during, or after?

Today kicks off the Pajama Sale event over at Peek-A-Boo Pattern Shop! Save 25% on all pajama patterns, no code required! Be sure to check out the discounts page for codes you can use when you bundle 3 or more patterns and pile on your savings! See my review of the Summer Pajama pattern here, and the Winter Pajama pattern here.


Wednesday, October 23, 2013

What I'm (not) Reading

I was 90% sure I had a book post ready to go for today, but when I opened it up...it was only an outline. I guess I dreamt taking photos, writing my thoughts, all of it. I discovered this problem last night after a long day of children's museum-ing with AB, so excuse my lack of a "real" post.


If you really want to know what I recently finished (it took me probably six weeks of reading a paragraph here, three pages there...the life of a mom!) it was The Mayor of Casterbridge by Thomas Hardy. If you've read one Hardy book, you've read them all (depressing to the max) but I still liked it.

Not one to leave you empty-handed, here are three of my favorite sewing/fashion books. I highlight these in particular because I find my fingers itching when I look at them on my Amazon wishlist. Enjoy!


Tuesday, October 22, 2013

Tuesday Tips: cleaning needles


Disclaimer: I stole this tip. But it's so good, I hope you can forgive me.

I was marathon-watching It's Sew Easy this weekend. I had to clear off the DVR so I could make room for the one thousand old movies I DVR'd from Turner Classic Movies. I have to do something to entertain myself while my husband is in Europe!

Anyway, there was a segment where Sue Hausmann was making duct tape purses (really). Obviously, this was making her machine a wee bit sticky. She shared a super fast way to clean off that residue.


Sew through an alcohol swab packet! It will clean the gunk off your needle in no time. We have a ton of these leftover from when AB was born (you use them to clean the umbilical cord area). If I remember correctly, it was like $1 for a huge box.

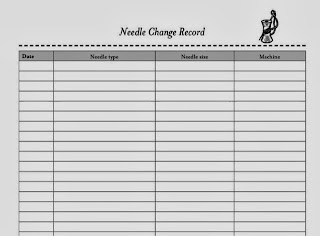
Have a hard time keeping track of the last time you changed your needle? The Sewist's Notebook includes a page specifically for logging this information. Buy your copy here!


Monday, October 21, 2013

Monday Musings

I'll start off with a disclaimer: I know that TV isn't real life. And cartoons...are really REALLY not real life. Let me back up.

When you're home alone with a flighty 20 month old and your husband is on a business trip in Europe, survival law kicks in. So maybe you eat frozen pizzas and watch more TV than you normally would. So sue me.

We've been watching a lot of My Little Pony, via Netflix. It's unoffensive and cute, and one of the ponies is a seamstress, of all things.


This is where I repeat that I know TV isn't real life.

More than one episode focuses on this poor seamstress pony and her life as a fashion designer. There was a time when all her friends were her (terrible) clients, when she worked tirelessly but had her fabric ruined by baby ponies, and one where the pony modeling her clothes became more famous than her.

Maybe it's because I can't get the theme song out of my head, or because of Project Runway ending, but I keep mulling over these episodes and feeling sad. Because they're true! 

The life of a fashion designer or seamstress has so much potential to be unfulfilling. I remember a few years back, I saw Christian Siriano on some reality TV show, and he looked so depressed. Like he knew his talent for design was being evaporated into costing meetings and celebrity chasing. 

If you couldn't tell, I'm still musing over this whole sewing-as-business thing I mentioned here. I suppose all work is a bit torturous at times, whether you're a designer or a doctor or a mom. I guess what I'm trying to say is that I admire people who work in a creative field. Not only is it difficult to BE creative, but you also have to be willing to take great risks.

If you have a creative business, more power to you! I admire you, and respect your hard work. Maybe someday I'll have the courage to join you! Until then, I'll be watching My Little Pony if anyone needs me...

Friday, October 18, 2013

Project Runway rehash: the finale!

Yesterday I found what appeared to be vintage Care Bears fabric (like this) at Goodwill, for $3. I normally don't dabble in vintage fabric, and didn't feel confident that it was "real". Not being in possession of a smartphone, all I could do was take a picture and Google it when I got home.

By the time I went back (like, 7 hours later) it was gone. Massive not-buyer's remorse ensued.

Aaaaaand, my husband left today for an 8 day business trip to Europe.

There were a lot of reasons to drink a whole bottle of wine last night (between the two of us...I think...), but the Project Runway finale definitely encouraged it! There's something very fancy about drinking some wine and watching a show about high(ish) fashion. On to the rehash! Spoilers ahead...

Things I loved:


I adore all the little cameos of former contestants. It's like a mini drinking game. "Spot the semi-celebrity!"

I thought Dom's win was predictable, but I was pleasantly surprised with Alexandria placing second.

Things I hated:


I didn't like how rattled Alexandria was about the judging from last week. I felt like she was compromising herself by ditching her t-shirts. I didn't really understand Nina's sudden turn-around.

If a model spilled coffee on my silk charmeuse gown...I think I'd punch her. For reals, no hyperbole.

Tonight's reason why I love Tim Gunn:


He's always so sweet to the final contestants during Fashion Week. And his affection appears to be genuine.

Favorite garment(s):


I wasn't crazy about Dom's styling. I thought her models looked like they were at least 30 when you know they're all 20. But I would die for that black and white jumpsuit.

Bradon's gold leather jacket...and that ombré dress! Planning my own rip-offs now! Other than that, though...snooze. And old.

And for my real favorite...Alexandria's entire collection. I want to watch a fashion show and feel like the clothing is obtainable. Bradon's chiffon dresses...nice. But where would you wear them? Alexandria's pieces? SO wearable, SO versatile (mix and match them all!). Love love love. More specifically: for some reason I adore this skirt even though it's see-through.

Least favorite garment:


Overall I liked the story that Justin's collection told me, but I didn't feel like I NEEDED any of his pieces. Sorry dude.

Also, this skirt of Bradon's was SO UGLY.


Best line of the night:


"I don't think Dom knows how sophisticated she is." --Zac


I'm happy for Dom, she's very talented and has done well all season. However, I can't help but think that Kate deserved to be in this finale over one of the boys. In fact, if it had been Dom-Kate-Alexandria only, I would have been a lot happier. Four people is kind of a drag.

There were some highs and lots of lows to this season, but ultimately it's going to be somewhat forgettable. Too much drama, too many unconventional challenges; the clothes didn't stand out well enough on their own. Ah well, I'm sure the reunion next week will be a trainwreck, and then we can get on with All-Stars!

Thursday, October 17, 2013

Flower Girl Dress

This dress marked a lot of firsts for me. First time fully lining a garment, first invisible zipper, first time working with crepe back satin, first...okay. Just those three. But the process FELT like one big adventure.

DIY Flower Girl Dress
Flower girl dress, exterior.

Flower girl dress, interior.

The pattern I used is the Oliver+S Fairy Tale Dress. I made View A, with the collar from View B, without the tulle skirt, and with a modified sash (more on that below).


The outer fabric is polyester crepe back satin (from Jo-Ann's). I went with that because I liked the feel of the crepe, it felt more high-quality than some of the other special occasion fabrics. AB and I wore the same color, so that was fun.

Deranged face selfie.

This dress looks very fancy, but it's fairly straightforward to construct. The bodice is simple (I made size 12-18m and there are no darts in that size), the skirt is a rectangle, and even though the tulip sleeves make a big impact, they're not difficult to make.

Tulip sleeve.

There's a reason I chose an O+S pattern when tackling my first lining and invisible zipper! The instructions, as always, are fantastic. I do NOT have an invisible zipper foot, just a regular one, but the instructions gave directions for either kind of foot. Don't blame the pattern for my not-so-invisible-pink-zipper, this being my first I didn't sew quite as close to the teeth as I should have. Jo-Ann's only had long invisible zippers in the right color and I feel like it's a waste of money to shorten a long zipper. Y'know, a waste of like 10 cents.

This fabric is really hard to photograph.

Towards the end of the process, I did deviate from the directions a bit. The thought of slipstitching the lining to the whole zipper made me cry. I managed to jam my machine in between the lining and the outer bodice and sew the majority of the lining to the zipper that way. I realize that sounds like Latin when you're reading it, so I'm not going to elaborate any further. I don't have any photos of what I did, so...sorry. If you're making this pattern and are stuck, ask in the comments and I'll try to explain further!


I also hemmed the lining last. It felt like tempting fate to hem the bodice, hem the lining, attach it inside, and magically have it be even. Additionally, the outer shell was supposed to have a 4" hem (2" turned twice) but I didn't like how it looked, proportionally. I made a 2" (1" turned twice) hem instead. I tried a blind hem but I've never had luck with it on my machine, even when using my blind hem foot, so I sewed a regular hem.

I also made a sash from gold chiffon. The wedding was in a Catholic church and the bridesmaids all wore mantillas (veils) in the same fabric, so this was my way of wedging AB into participating. She continues her hatred of having anything on her head.


I'll tell you what, that sash about killed me. If you look at the O+S pattern envelope, you'll notice that there are two options, a small belt with a bow and a sash with a big bow. The chiffon looked bad bad bad no matter what kind of seams I tried. I decided to do a rolled hem on a single rectangular piece of fabric, cut on grain, and that took a LOT of trial and error with my serger.


Thank goodness I signed up for the Craftsy serging class. I whipped out my iPad, took a picture of my fabric and the problems I was having, and posted it to the class using the Craftsy app. I was able to ask the instructor, Amy Alan, for help. She responded and her tips saved the sash. Yay!

As for the wedding and how AB did as a flower girl, wellllll...luckily I was able to walk with her down the aisle. She carried her basket the entire way but didn't toss the flowers (well, they were leaves, this was a fall-themed wedding). When we got to the end of the aisle her daddy carried her off and five minutes later they left the church. Ha! So we had the photo op and she looked adorable (and she received lots of compliments) and the rest of the wedding was wonderful.

Now for a photo dump of the terrible pictures I took. I normally don't take my own photos at weddings because they never look good (see crazy selfie above), and someone else is usually being paid large amounts of money to do that. I also don't have any from the wedding, just the reception. Someone was busy being a bridesmaid during the ceremony.

flower girl dress


And a special shout-out to the beautiful bride, who devotedly reads this blog every day and included my lovely daughter in her wedding. Congrats!

I don't know about you, but the temps are falling where I live! Just in time for the cool weather, Peek-a-Boo Pattern Shop is offering the Alpine Puffy Coat for today's Thrifty Thursday deal. Grab this versatile pattern (works for boys or girls!) today only for $4!


Newsletter sign up

.