Monday, March 20, 2023

Quality Fabric for Every Budget

These days, inflation is driving the price of goods sky high. Fabric is not immune to this trend, but as thoughtful garment makers we know that sacrificing quality for price is not worth it in the long run. How do you purchase good fabric without breaking the bank? Is it even possible? No matter what your budget, I have my own personal recommendations on where to look and how to source great quality at a range of price points.

Quality Fabric for Every Budget

A note about location: I am in the US and my experiences revolve around ordering and shipping here. I do order outside my country but typically only from Canada or Australia. It's rare that I order from the UK, so my experience with UK shops is severely limited! If you have some good sources, please leave them in a comment below.

rayon rib knit from LA Finch

Budget-friendly


Shopping online for fabric is intimidating if you don't have a trusted source. Sometimes prices look too good to be true, and you might question how 100% linen can be $5/yard. This is where deadstock fabric comes in. Deadstock is fabric that has had a previous life in a fashion collection or design house. Basically, it's leftovers! It's often a small amount that has been purchased at a low price and is being resold by a fabric retailer. It's limited, it's one-of-kind, and despite the low price is often high quality. 

My favorite deadstock retailers are LA Finch Fabrics and Fabric Mart. I am constantly amazed at their low prices, and then always happy with the high quality. Almost all of my wool coating comes from FM because it's so affordable (under $30/yard for 100% wool, and even cashmere once!) and amazing. Josie at LA Finch is located in the heart of the LA fashion district and therefore has ready access to deadstock from those designers. She always carries interesting fabrics and I feel like I have an order on the way from her at all times.

A word of caution about deadstock retailers: if you love it, buy it. Nothing haunts us like the unique fabric we didn't buy that never came around again. Ask me how I know.

Another budget-friendly retailer is fabrics-store.com. Yes. The name looks fake. If you get on their website and look at their prices, you'll think it can't be real. I can assure you, they are real! Fabrics-store.com does one thing and does it well: linen. Tons of different weights, weaves, and colors. They have, by far, the best prices for linen and I've liked all the pieces I've gotten from them.
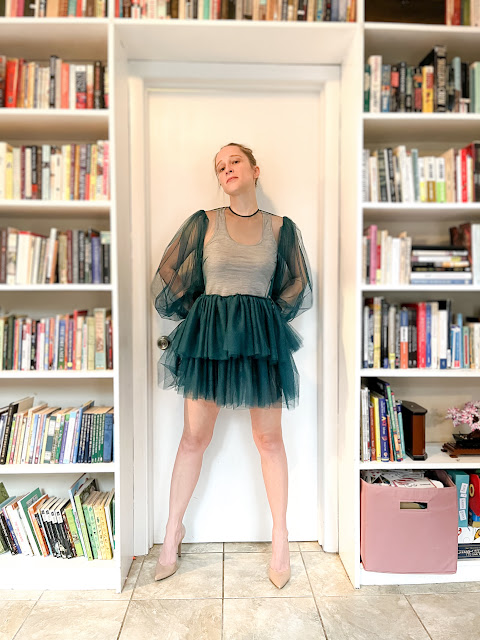
wool jersey from The Fabric Store

Mid-range


If you're looking for something specific and can't find it among the deadstock sellers, you may need to graduate to a more mid-tier retailer. Their selection will be wider but their prices may also be a bit higher. My go-to mid-range fabric seller is Mood Fabrics. They sell absolutely everything. Rayon velvet? 400 search results. Hemp jersey? 1600 results. They also carry highly unique trims and buttons. When you can't find something specific, check Mood.

Mood carries deadstock as well, helping to keep fabric out of landfills and their prices manageable. The New York store is located in the fashion district and makes Mood a seller you can trust.

The Fabric Store is located in Australia and they are my go-to for nice wool knits. They also carry Liberty of London if that's your thing. Their prices are not cheap, but I'm adding them to this category because they often run really good sales. Since they're in the opposite hemisphere from me, it feels like their sales work in my favor. My all-time favorite wool t-shirt is made from a jersey from there. They ship DHL to the states and always quickly.

wool blend coating from Emma One Sock

High End


You've been sewing for a while. You're feeling more confident in your skills and you want to splurge a little on a special fabric. Who can you trust at the high end of the fabric shopping scale?

I'm going to slide another deadstock retailer in here who tends to have higher end fabrics at higher end prices. Emma One Sock has, quite possibly, the most off-putting website to an elder Millennial like myself, but I can assure you that their fabrics are stunning. They provide a ton of photos, Pantone color details, and even links to coordinates. In addition to deadstock they keep a steady stock of high-end basics like wool crepe, linen knits, and linings.

Blackbird Fabrics carries just about everything I could ever want. Wool coatings. Yarn dyed linens. My favorite cotton/modal jersey. I would not qualify them as affordable but I will say that any time I order, I know that I'll be happy with the cost to quality ratio. It's probably a good thing that their fabrics aren't cheaper or I'd be shopping there all the time.

Did I leave anyone off the list? Who do you trust for consistent quality fabric?


Tuesday, March 14, 2023

How to Sew French Seams with a Side Seam Split

Hello sewists! Today I’m sharing a French seam tutorial, and how to sew it even when your garment has a split in the seam. Typically, this would be on a top, but it could also be on the bottom of pants or even the hem of a skirt. I’ll be demonstrating using the Anno & Pum’s Kid’s Peasant Top sewing pattern in a textured cotton woven. This fabric is originally from Alyssa May Design textiles, but it’s been stash-aged quite a few years.


The ideal pattern for a French seam calls for a lightweight woven fabric, and the seam allowance is at least 1/2”. It can be larger, but not smaller. The pattern I am using has a 1/2” seam allowance.


To start, place your fabric WRONG sides together along the side seam. Sew this seam with a 1/4” seam allowance (or half your SA).


French seam tutorial with a side seam split

Stop your stitching when you get to the extra fabric for the split.


French seam tutorial with a side seam split


At this point, clip into the seam allowance just up until the end of your line of stitching.
Then, carefully trim the side seam allowance to 1/8”. Do not skip this step! (I do, sometimes, and always regret it!). 


French seam tutorial with a side seam split

Then take your garment and flip it around so it is now RIGHT sides together. Again, sew the line of stitching along the side seam, at a 1/4” seam allowance (or half your SA). This step encloses the raw seam allowance.


French seam tutorial with a side seam split


Again, clip into your seam allowance up to the end of the line of stitching. If your fabric frays heavily, you can sew a few stitches across the raw edge of the French seam, or dab it with a bit of Fray Check.


French seam tutorial with a side seam split


Using your sewing machine and a zig zag stitch, finish the raw edges of the fabric for the split.


Fold the fabric to the wrong side and press. Because you clipped into the SA it should press flat neatly. Continue following the directions to finish the split.


Your French seam side split is now complete! Pat yourself on the back for a job well done. If you are interested in more hacks, specials, and more styles to sew for the Anno and Pum Sewing Patterns, make sure to join their Facebook group

I am a freelancer for Anno and Pum Patterns and received this pattern for free.

Thursday, March 9, 2023

Sezanne-Inspired Fibre Mood Jill

It was hard to pick a title for this post, because my inspiration started in one place, which led me to a pattern to hack, which led to an impossibility in dressing, which led to another hack...anyway. It was a long journey. 


Let's start with the inspo:


This is a jumpsuit that I saw on Pinterest. It's from the designer Sezanne and it comes in a couple different colors. I LOVED the back, the buttons and the little cutout. It looks fairly simple but elegant. I wanted to make one and I wanted it in this exact same emerald green. I studied the online listing and couldn't figure out what kind of fabric it was. I chatted with some sewing friends and eventually landed on a crepe back satin from Mood Fabrics. It's acetate and viscose, which meant that it wasn't a gazillion dollars like a crepe back silk would have been (I refused to make it in polyester). Unfortunately, I cannot find it online anymore, I'm sorry! I ordered back in August of 2022 so it might have been deadstock. The color is forest and it's exactly what I wanted. I used the crepe (non-shiny) side out as the right side.

Fibre Mood Jill hack

With the fabric sorted, I needed to figure out the pattern situation. Eventually, I found my way to the Fibre Mood Jill dress pattern (Loni from Havin Sew Much Fun sent me the link to the pattern, and she helped me find the fabric, so basically this was our brainchild). The back was close to what I wanted, the front was the same except it was gathered instead of having any darts/pleats. A good start.

Fibre Mood Jill hack
This is so wrinkly

For the pants, I pulled out Butterick 5391, which I'd purchased a long time ago. It's got a skirt and a pair of dress pants with four different leg cuts. I chose the wide leg, made them even wider, ignored the waistband and got to work figuring out how to combine the Jill top and the pants into a jumpsuit. I made a muslin of the top and turned that gathering into a vertical pleat in the front. For the back, instead of sewing the two pieces together, I kept them separate to allow for the loops and buttons. 

My muslin in poly crepe,
after I added the waistband

Using a paper pattern, I increased the rise of the pants high enough to sew it into the bodice of my fakey Jill. Between the paper pattern and my muslin I felt okay about cutting into my fabric.

Y'all. I got to a point where I could try something on and there was absolutely no way to get in and out of this jumpsuit alone. To be able to pull the pants section down, you need to be able to undo the back buttons. Maybe other people are more dexterous than me, but I couldn't do it. I laughed SO HARD at myself, watching in the mirror as I desperately tried to work the buttons. 

Fibre Mood Jill hack

Clearly, Sezanne either had some escape method I couldn't find online, or they just designed for the look and not functionality. I wanted to wear this garment to an event about an hour away, and the thought of asking a stranger in the bathroom to undo my buttons so I could pee was just too far. I decided to make it two pieces instead of a jumpsuit.

Fibre Mood Jill hack

At that point, I added a "waistband" to the bottom of the shirt. I had it just meet in the back and it closes with rouleau loops and buttons just like the center back. It's a waistband with a facing and to ensure everything laid neatly,  I did a lot of hand sewing to tack the facing.

Fibre Mood Jill hack
Yes, wrinkled

The pants...well. I wanted them to be super high rise so that my belly wasn't necessarily showing at all times (did I mention the event I was attending was technically a work event for my husband?). Because I had a "waistband" on the shirt, I did not also want a waistband on the pants. I thought it would look too busy. So, I pinched out at the side seams and kept making the pants narrower and narrower at the top to keep them up around my natural waist. I drafted waistband facings. I inserted clear elastic inside the top of the pants. I tried wearing shape wear and tucking the facings into it. I tried double sided fashion tape. All the things.


No matter what I did, the pants would roll at the waist and the facings would sneak their way out. It made me insane but eventually, I ran out of things to try and time in which to try them. The day of the event, I believe I went with a combination of the fashion tape and tucking the facings into shape wear. It was a lot of nonsense. Turns out, 50% of the women at the event had their midriffs out anyway. I should've just leaned into that look (and made the rise lower) OR put a waistband on the pants. 

Fibre Mood Jill hack

Frustratingly, the facings also have a tendency to roll out of the armholes as well. Yes, I understitched everything. I hand-tacked them to the side and shoulder seams inside the garment. Didn't matter. Still rolled. It's really obvious in the photo above.

For all the frustration it gave me, I enjoyed wearing this outfit. It felt nice to be dressed up in pants instead of a dress (my normal go-to for a fancy event). This color was absolutely everywhere so clearly I was on-trend. I made my husband a matching tie from my leftover crepe.


At the end of the night, it turned out to be a very good thing that I was in pants and could easily move around...we went to get in our car in the parking garage and the garage was...closed? It was midnight on a Friday. Nobody else was around. We couldn't drive out. The arm bar would not lift up. There were curbs everywhere so you couldn't go around it. The "help" button went to an office that closed at 2pm. After trying every possible method short of calling the police, we eventually had to call an Uber to pick us up at the parking garage and take us back to our hotel. The Uber driver told us that somebody had definitely been murdered at our hotel, and y'know what, it's probably better that our car was stuck in the garage overnight so it wouldn't get broken into. Cool cool cool. Total disaster. We had to call another Uber in the morning to go back and get our car. 

Right: Nikko top and Victoria Blazer

The event was back in October and since it got cold right afterwards, I didn't wear the outfit again until this spring. I pulled out the pants and did some mixing and matching with other tops in my wardrobe. I think they work well and for whatever reason, they felt more secure (probably I gained a little weight so they're staying up?). It can be fun to play dress up with older pieces and give them new life.

So there you have it, a cautionary tale about finding RTW inspo online. Be careful what you wish for, you may get stuck inside your outfit!

Save 15% on A Sewist's Notebook, now through 
Friday, March 10th with code COOKBOOKS15


Tuesday, February 21, 2023

Neon Polar Bear Nova Coat

I'm a little embarrassed about this one. I already made one coat this year, my Moonrise Kingdom coat. It's awesome, a dream come true, I'm so happy with it...but I almost immediately made another coat. Actually, it was a coat sandwich with lingerie in the middle. Anyway.

Papercut Patterns Nova Coat

I blame Josie at LA Finch Fabrics for this one. Not my inability to control my fabric shopping. Wool is my weakness, especially affordable wool that is high quality. When Josie stocked these teddy French Terry wools, I tried to resist. The pink! The black! It would make such a good coat! And then I finally bought the Nova Coat pattern (I can't remember why...probably saw yet another cool one on IG). I knew the FT and the Nova would be a perfect match. 

But white? I live in the country, have three kids and four pets. Why did I buy white?

Papercut Patterns Nova Coat

Well. I had this idea. White plus NEON. A neon pink lining. Neon green piping along the interesting seam lines of the Nova. Wouldn't that be cool?? And so I got online to order the coating and low and behold, Josie had just stocked a pretty coral rayon challis that was on sale. It all came together, what else was I supposed to do but give in to the idea?

Papercut Patterns Nova Coat

To prep the wool, I talked to some other sewists who had bought it. I decided to dampen the fabric with a spray bottle, then put it into my dryer on low heat with some wet towels. It did shrink a few inches with that very simple treatment (and maybe 10 minutes on high heat before I remembered to do low). Buy extra and prep it!

Papercut Patterns Nova Coat

I will describe this fabric more as a boucle than a French Terry. It has a nice stretch and heft. I've seen some people make tops with it, but for me that would be too bulky. I like it for a coat, personally. Just keep it FAR away from velcro (ask me how I know).

The Nova Coat comes in 5 sizes. I measured into a 2 for the bust and a 3 for the hips. The pattern pieces are unusual and I did a lot of head scratching about how to grade out. Then I realized, there is a gajillion inches of ease and I don't need to grade. Honestly, I could probably make a size 1 and it would fit too. This one is a straight size 2 without mods.


This coat came together really quickly, as far as coats go. I even had to spend extra time basting the piping in and it was still fast. The directions were great. I only got confused once, with the mitered corner on the inside, but I kinda just pinched it out until it looked right. I don't think I've ever had a coat lining sit so smoothly inside a shell as I did this one (granted, it might be because the rayon challis grew so there isn't any pulling). If you use this fabric, I would recommend a walking foot just because of the bulk. My walking foot didn't cooperate well with the piping (the foot is too wide) so I had resort to a regular or even zipper foot. The walking foot was better.

Papercut Patterns Nova Coat

The sleeves are finished with a facing and the lining is sewn to the facing. I LOVE this method in coats and used it for my Yuzu Raglan, I'm not sure why more patterns don't do it this way.

This patch thing is wonky AF not CUTE AF

I used a leopard print faux fur as my neckline facing. It doesn't match the rest of the coat, at all. It's totally ridiculous. But I think we've already established the ridiculousness of this coat in general. Don't tempt me to do something cool with a small facing, I'll do it and laugh at myself for years.

This Nova is super cozy and fun to wear. I will do my best to keep in clean but my expectations are low. I will also stop making coats...this year...maybe...


Wednesday, February 15, 2023

Ginger Jeans vs. Ash Jeans

I've been promising this post for a while now, and it's time. If this were a documentary, there would be a clip of two boxers getting ready to fight:

Ginger Jeans vs. Ash Jeans

Ash versus Ginger! The fight to the top of the indie jeans pattern world! I'm going to start this post with a comparison of the facts, and my completely biased opinion will be at the end. I've made both patterns, obviously. Ginger four times, Ash twice. You can scroll down to the end to see photos of each of my versions.

And because of course this happened in the middle of drafting this post, I have to mention that CCP just released the Jude Jeans pattern. It's two views and regurgitates their Ginger block into another pattern.

Size chart

Ginger offers two ranges, 0-20 and 14-32. Ash offers two ranges, 0-20 and 14-30. Ginger is drafted for 5'6" and Ash for 5'5" (Ash offers tall and cropped heights all within the pattern). The hip range for Ginger is 33"-63", for Ash it's 34"-62". Here are the charts:

Ginger

Ash

Ginger

Ash

On the 0-20 charts, Ginger has a 9" difference between waist and hip. Ash has a 10" difference. On the 14-32/34 charts, they both have a 10" difference between waist and hips. What this information tells me is that if you fit into the 0-20 range of sizes, there will likely be one of these charts that is closer to your measurements than the other. Of course, you may require grading regardless, but there is a difference between the two and it's worth investigating which is better for you.

Note that the mid-rise Ginger expansion pack is only available in the 0-20 size range.

Views

I made a handy chart for you to reference which views, rises, etc. are available with each pattern. As I mentioned above, the Jude Jeans have been released using the same Ginger block, so I went ahead and added them to the chart.


You cannot mix views on Ginger. I found this out the hard way. The pattern pieces are vastly different between rises/leg types and you need significant drafting skills to mash them up. For whatever it's worth, CCP is claiming in the comments on their Jude release post that you CAN mix those views up. 

Price

Ash is available as a PDF for $19.50 or a printed pattern for $22.29 (prices converted from AUD to USD).

The original Ginger is $16 for a PDF and $20 for a printed pattern (each size range sold separately). The mid-rise "expansion pack" (in quotes because it's a whole pattern) is $14 and is only available in PDF.

The cheapest you can get all views of Ginger is $30 and Ash is $19.50.

Jude is only available in PDF (still two size ranges) for $16.

Instructions

I purchased a printed version of Ginger in 2016, and the mid-rise expansion PDF in 2021. I bought Ash in PDF in 2022. I make these notes to let you know that there is always a chance instructions change and are updated from what I used.

I found many mistakes in my printed version of Ginger (detailed on my blog here). The instructions for Ash were thorough and detailed and I had no issues. Take it with a grain of salt that by the time I was making Ash, I'd already made a lot of jeans and needed less hand-holding.

There is a Ginger sew along here and an Ash sew along here. At the time I was making a lot of Gingers, I used the sewalong a lot to supplement the instructions. I never even looked at the Ash one.

Gallery


low rise Ginger Jeans
Ginger low rise in denim

mid rise Ginger Jeans


flared leg Ash Jeans

wide leg Ash Jeans

Biased Conclusion

I tried to keep my above comparisons as factual as possible, so you could draw your own conclusions about these patterns. Of course, I have my own opinions.

Ginger sucks. Ash is awesome. The existence of Jude is a stupid slap in the face.

That's the short version. So, why? Objectively speaking, you get way more for your money with Ash than you do with Ginger. Yes, Ash only has one rise, but in my experience it's much easier to stick with a mid-rise and change the legs as you like. After kids, low rise became very difficult for me to fit well, and high-rise just isn't loved enough by me to care about having that option.

The directions for Ash are just plain superior.

Ash fits me better. Both patterns require me to adjust the center back for a swayback, but that's the only change I need with Ash. These are facts that are true for my body, and honestly, it might depend on the day. Fit is in the body of the beholder and what works for me, even if our stats are the same, may not feel comfortable for you. Fabrics change, in particular stretch denim, and unless we're cutting the exact same bolt our mileage will vary.


I am salty about CCP. I've struggled with many of their patterns (and had success with others too). I resent the lavish praise I often see about Ginger when, in my opinion, it's not merited. Making jeans is difficult, and there is no magic pattern that will make it easy. It's harmful to praise a pattern to the high heavens and set up unrealistic expectations for other sewists. Sometimes things aren't clicking, we make mistakes, whatever, but sometimes the pattern is the problem, not you.

Jude being released right in the midst of me writing this post is so typical of what I would expect. Instead of four views in one pattern, CCP wants you to buy two different patterns. I'm sure I'm comparing apples to oranges; everyone has their own business model, expenses, etc. and maybe it's not fair to say Megan Nielsen and CCP should operate the same way. But as the customer and consumer here, my feedback is that buying two patterns vs. one is annoying.

As you can see, I have four pairs of Ginger Jeans, but the mid-rise are the only ones I wear. I'm sure I will soon replace those with a skinny pair of Ash Jeans, and my Gingers will be shoved to the bottom of the closet.

You can buy Ginger here and Ash here. Do you have any more questions about these two patterns?

Monday, February 13, 2023

Moonrise Kingdom Coat

I can't believe I'm here. Inside this coat that I've been dreaming of for I don't even know how long. 


The Wes Anderson movie Moonrise Kingdom came out in 2012, ironically the year I started learning how to sew. I'm not sure when I first saw it, but I certainly fell in love right away. As my sewing skills grew, I realized that if I could find the right fabric, I *probably* could recreate the iconic pink coat that the main character Suzy Bishop wears in the climax of the film.


Every time I got an email from a fabric shop about new wool coatings, I looked for the right fabric. Pink and white small scale houndstooth. Fabric Mart. Emma One Sock. Mood. Blackbird. Places that I knew I could count on for quality wool coatings. Every winter became a sad treasure hunt that never paid off. 

Until 2022.


Finally, finally, finally...Emma One Sock stocked THE ONE (it's sold out, I'm sorry). The one I had been waiting for. It was 100% perfect. It has since sold out, but at $25/yard it was even reasonably priced (it's a blend). I ordered it, it arrived, and it was still perfect in person. Thus began the search for the perfect pattern.

If you've been around the sewing interwebs long, you've probably seen the Tilly and the Buttons version of the Moonrise Kingdom coat. Tilly used the Watson Jacket pattern from Papercut. I attempted to track down a copy of this pattern, but it's no longer in print. It has notable differences anyway, so I decided to go ahead and find a good coat base and hack it from there. I landed on Lisette for Butterick, B6385. The length was correct and the collar looked similar. Even though Big 4 patterns aren't my favorite, I've worked with some Lisette patterns in the past and trust Liesl+Co wholeheartedly. This pattern also comes with multiple cup sizes, the front center pattern piece (with the dart) are the pieces that are drafted differently. I used a C-cup piece.


I made a muslin because I often have to grade out in the hips with long coats. The bodice is a 10 and I graded to a 14 in the hips. It was a pain in the arse because there are so many panels to the pattern and I wasn't sure of the easiest way to accomplish the grading. I ended up only grading out on the side seams.


I played around with muslin and draping and looked at pattern pieces for capes online (I have some resources saved on Pinterest). I wish I would've actually drafted something on paper but I hate math, so, there. In the end, the cape is fine. A little more swish would've been good but I'm okay with it. The neck edge of the cape is the same as the neck of the coat. I basted them together and sewed the coat like normal. The cape is a single layer and the edges are finished with rayon seam binding.


I also increased the height of the collar by 2". Suzy's coat looked like it had a very tall collar, tall enough that it could flop over and be buttoned into the cape. Two inches ended up working out great.

I omitted the welt pockets and changed them to in-seam. I used the pocket bag pattern pieces that came with the coat and they are a bit small to use as in-seam pockets.

The pleat is sewn down in a few places and open in others

This pattern has some nice details and finishes that you won't see in all coat patterns. The lining is hand-sewn, there is a very particular back lining pleat, etc. The only thing I disliked is that there is no shoulder seam, it has a yoke that comes over the shoulder into a forward seam. I would have preferred a traditional shoulder seam just to make my cape-drafting easier.

I only saw one "mistake" and that was that the back pleat in the lining was basted closed, but then you were never told to remove the basting stitches.

My lining is a cotton lawn that I got in a $5 mystery box from Michael's (watch the unboxing video here, it's hilarious). For the sleeve lining, I used a poly woven leftover from a previous coat (I think it's the same as what's in my Oslo coat). The buttons are from Jo-Ann's.

This was me trying to make Suzy's face

The beret. Oh Lordy this beret. The only reason I made it is because I already had the most perfect fabric. It's an expensive, thick, reversible wool coating from Blackbird and I absolutely ruined it trying to make a poncho thingy. I managed to make this beret from it but it took a LOT of trial and error. If you review Suzy's beret, there are no visible seams on it. If you look at beret patterns online, they all have seams. I should've just made one with seams and been done with it, but I'm a glutton for punishment. Anyway. This is as good as it's going to get and that's that.


I didn't intend for this coat and beret to become a costume, but now that I've put all the work into it, that may happen come Halloween. We'll see. It's sort of an obscure reference if you're not a Wes Anderson fan. In any case, it feels amazing to have had this goal for so long, and to finally see it come to life.

Newsletter sign up

.