Tuesday, June 30, 2015

How to Make a Moodboard Part 2: Assembling the Images

Last week I posted part 1 of this tutorial, collecting your images. Today we're wrapping up with part 2, assembling the images into the actual moodboard.


Let's go back to our good friend PicMonkey.


This site has an option to start an image from scratch, allowing you to choose your own dimensions. When I made my first moodboard, I played around with this and ended up simply cropping my final image down. I recommend starting with a large image and going from there.


To add images to your blank canvas, you will need to click on the butterfly on the right (Overlays) and then choose Your Own.


A dialog box will pop up and allow you to choose one of your saved images to insert on the canvas.


You can move and resize the image however you'd like. The background of the canvas and the background of the image are both white, so we have no issues with colors not matching.

To add text, click on the Tt symbol on the right (Text). Click on one of the multiple font options and then on Add Text. Click in the box and type your text. You can size and color the text as needed.


Since I'm making moodboards every month, I actually saved a template image to speed up the process. 


Each month I start with this template, and add images from there. When it's done I save the new image and keep the template for next month.

And in case you missed it in the comments last week, there is a great app called Moodboard that you can use for this same sort of process. I've only used Moodboard Lite, which is free, but works great for boards that aren't too complicated.

There you have it, my process for creating moodboards! I hope this was helpful for all of you who asked. I'd love to see any of your boards if you use this tutorial! Feel free to link below.

Thursday, June 25, 2015

Father's Day gift: men's shirt refashion

My husband is pretty hard to shop for, not because he has everything, but because he usually ends up buying his own gifts. But every now and then I get a great idea and can surprise him. For Father's Day this year, I planned on buying my husband a tshirt from a local brewery. He is a cyclist, and the shirt reads "Ride Bikes Drink Beer". Just one problem: when I went to purchase a shirt, all they had left was XXL and Small. Whomp whomp.


But like I always say, when life hands you an XXL shirt, you just cut it up and custom-sew a new one (don't you always say that?). Last summer, I taught my husband how to sew, and part of his lessons included copying his favorite tshirt and making a pattern. Before cutting up the tshirt, I double-checked that it would work and laid the pattern on top.


It was close enough :) I decided to keep the neckline and shoulder seams intact, so when placing the pattern on top of the shirt I offset it by the amount of the seam allowance.


Next, I cut the sides of the tshirt open and cut the sleeves off at the seam. I folded the fabric down the center and used the pattern to cut the front and back. I also cut the sleeves down to fit the pattern. 


After reassembling my new pieces, I now have a smaller shirt!


My husband was happy to get a custom-made shirt, and I was happy to use my skills to overcome an annoying problem of a sold-out gift. 

Have you ever cut down a too-big shirt to fit? 

Tuesday, June 23, 2015

How to Make a Mood Board Part 1: Collect Your Images

I've had a lot of fun putting together my Mood Board of the Month posts, and after many requests I've prepared a tutorial on how I create my graphics. No fancy photo editing software here, the programs I use are free and available to anyone with a computer! I've broken this tutorial up in two posts. Today I will show how to collect individual images for the moodboard. Next week, I'll go over assembling them into one large image.


Even if you don't have a blog, creating mood boards can be useful for wardrobe planning, pattern organizing, and inspiration. My monthly boards combine four elements: Inspiration, Color Palette, Sewing Patterns, and Fabrics.

use Pinterest to save my ideas, since I need both the images and their source links to be easily accessible. My Inspiration outfits are created using the Polyvore app for iPad (free). I decide on the look or silhouette I want for that month, and the app easily lets me search for real-world clothing options.


When I'm done creating the "set" I can save it on the app, which uploads it to my profile on the web. Then I can pin the set to my Mood Board of the Month Pinterest board.


My Color Palette is created using the website ColourLovers (free). I won't go into too much detail about that site in particular, but once I've created the palette I can also pin the image.


Next, I browse sewing patterns that fit with my silhouettes and also pin those images to the board.

Lastly, I visit my favorite fabric sites and search for fabrics that will work with the patterns and my chosen color palette. This part is trickier than you'd think. I often visit multiple sites to find something that will work, which is probably why so many of us have a hard time matching fabric to pattern! As before, once I find what I want, I pin the image.

Once all the images are saved on Pinterest, I need to save an actual image file to my computer. The majority of websites will allow you to right-click on your mouse and choose Save As. Choose a file and save the image there.


Occasionally I run into sites where I can't save the image directly.


In this situation, I use a tricky cheater method. With the image up on my screen, I push the Print Screen button on my keyboard. This essentially creates a copy of your whole screen on your computer's imaginary clipboard. To "paste" this copy, open the program Paint. Then push Control+V to paste the image into Paint. 


A word about Paint: it's not perfect. It's not Photoshop. But it's also free. If you can get past its quirks, it works just fine for certain purposes.

After pasting the image into Paint, click and drag to make a box around the portion you want (you can see the box around the swatch in the above image). You only get one shot at this before Paint gets all weird, so do it right! After selecting, click Crop.


Then you can save the image with all your others. Be sure you choose PNG when saving. A PNG file retains a transparent background, which isn't 100% necessary but usually looks nicer.

All the steps I've covered so far will leave you with a nice set of rectangular images. But what if you want different shapes? For example, all my fabric swatches are saved as circles.


Time to introduce you to your new best friend: PicMonkey.


PicMonkey is a free photo editing website. There is, of course, a paid version with upgrades, but thus far I've found the free version to suffice. There is no sign up/login/account with the free version, there is no saving work anywhere other than on your own computer.

To create the circular images, open one of your JPGs in PicMonkey. Then click on the picture frame icon on the left (circled in red, below).


The frame menu brings up different options for...frames :) You want the top one, Shape Cutouts.


It defaults to circle. You can then move the circle around and crop as needed. Click Save to save the image on to your computer, as a PNG. You need a transparent background for the circular images.

You should now have JPGs or PNGs of all the images that will go into your collage. Questions? Ask in the comments below! Check back next week to see how to assemble all these images into one big happy moodboard!

Thursday, June 18, 2015

LOL Swing Top

Have you heard of the Friday Fiver? Every other week on the blog Crafterhours, you can score a great deal on a sewing pattern, $5 for that day only. A while back I picked up the LOL Swing Top pattern, from Jennuine Design. It's a cute little girl's top featuring a racerback and an exaggerated A-line shape.


I wasn't completely sure how I'd feel about the shape, but what drew me to the pattern is that it can be made in a knit or woven. The woven version has a button at the shoulder. I have very few patterns for wovens, but somehow I've still managed to acquire adorable woven fabric. It needs to be made into something and not just sitting on my shelf!

That being said, this version is in a knit :)


I thought I might hate all the extra volume in this top, but it turned out pretty darn cute (my cutie pie model doesn't hurt, either!). This is a size 3T. The only modification is that I removed a 1/2" wedge from CB of the yoke for my daughter's narrow shoulders. Just like mom!


It's also unhemmed, because it could probably use some more length. Normally I'd be daunted by adding length to a crazy silhouette like this one, but the pattern gave some great directions on how to do it. This was my first pattern from Jennuine Designs and it was excellent. It had all those little features that make PDF patterns easy to use (layered sizes and a page printing guide just to name a few).


As you can tell, AB loves it! 


The fabric is a cotton jersey from The Fabric Fairy (sold out). It's my absolute favorite fabric. Ever. I've made myself one dress from it (and matching undies!) this top for AB, and I have a dress for Baby H cut and ready to sew. Y'know, so we can all match like total goobers. The knit bands are a cotton/spandex knit from Girl Charlee.


If you have a little girl who likes to twirl, this pattern is perfect! I can't wait to try it with a woven and use some of the fabric I've been hoarding. In the meantime, this top will be getting plenty of use this summer!


Tuesday, June 16, 2015

Wardrobe Planning for Kids?

I've spent a LOT of time planning my own wardrobe. Choosing a color scheme, silhouettes, and ultimately fabric combinations has been fun, and in a way, freeing. But in all this time, I've barely given any thought to planning clothing for my kids. Now that I have a second girl, I'm reusing clothes that my first wore three years ago and seeing them in a different light.


Nothing matches! Everything is cute, sure, but it's kind of a hodgepodge. There are good reasons for this; a large percentage of their clothing is bought by family members (and I'm very grateful for that!). The rest of it is bought by me at a local kid's resale store, where price and looks usually dictate what comes home. Then, of course, there are the me-mades, which tend to be from random cute fabric and leftovers from my projects. Not exactly a great recipe for a successful wardrobe. 

With Baby H I've recently purchased some wool pants (for fall/winter) that will double as a diaper cover. Wool is expensive and these are definitely investment pieces. Selecting these few items got me seriously thinking about planning both girls' wardrobes more carefully, especially since I now have to dress two kids before I can head out the door. I need to be efficient or we'll never get anywhere!


Long time readers will notice a trend here: navy, pink and grey. Those three colors dominate my own wardrobe. I decided to stick with the same colors since I know that I will have leftover fabric that matches. Just to mix it up a bit, I think I will take inspiration from this adorable baby dress and also throw in a soft orange:


As for AB, the three year old, she's almost beyond having me plan her wardrobe. Right now she's big in to character tees and Spider-Man shoes, not exactly winners in a streamlined wardrobe. I have a feeling that as her third year marches on, her (inherited) stubborn streak will come in to play with her clothing. Pick your battles, they say, and I'm happy as long as she's dressed!

If you have kids, do you select clothing from a certain color scheme? Do you stick with one brand of clothing or a set of TNT patterns?

Thursday, June 11, 2015

Seamwork Aurora...fail?

"Are you stupid or something?" --from the movie Forrest Gump

A bit harsh, but this phrase is what's going through my head as I look over these photos. I mean, I just had a baby. Three weeks ago. Why oh why am I sewing new things for me? In the BEST of situations I'll get back to my pre-baby weight, but who knows when that will be? Or what shape I'll have, regardless of weight?


But I really liked the Aurora as soon as I saw it, so try not to judge me too harshly for making it despite my drastic body changes. Here goes!


A little about this pattern in case you haven't got a subscription to Seamwork: it's a tank top with a yoke. There is a pleat in the back and gathers near the yoke. The yoke is two layers and all the other openings (neckline, underarms) are finished with a narrow hem. Then the seam allowances are tacked down to hide them.

Yep. A 3/8" narrow hem. On a knit that must drape well enough for soft gathers. Oh, and it should also make a pretty pleat.

Now that I type that out, it sounds ridiculous.

Excuse the hanging thread, it's not hemmed

This is a straight size small, which I chose after a quick muslin. I dropped the neckline an inch and it looks terrible. There just isn't enough space to work with along the neckline and I couldn't get a smooth, normal-looking curve. Then somehow my straps/yoke ended up way too small/narrow. Proportionally, this is a mess. I *think* it will look halfway decent with a cardigan over it (hey, maybe I should have tried it whilst taking photos?).


The bust area is probably too tight from my ginormous nursing boobs. There's also something cray-cray going on in the back. Swayback? A butt/hips that are pulling the fabric? Haaaaaaalp! Or should I ignore all of it until I lose some more weight?!


The body of the shirt is a poly/Lycra blend from FabricMart, and the navy yoke is a rayon knit, also from FM. The stripes are sheerish. The rayon is too thin and drapey for a yoke (even double-layered) but I forced the issue and that's probably why the straps ended up too small.


Getting back to that crazy narrow-hemming business, I decided to try something I've never done before and draft facings instead. I know, facings in a knit! The horror! But since the stripes were kind of sheer it seemed like a good idea anyway. It worked pretty well for my first time doing it, but it would have helped if I had/could have understitched to hold the facings in place. The knit was too thin for that. There was some trial and error with the facings since I wanted them to NOT gather and NOT pleat like the front and back bodice.


All in all, a lot of experimenting led me to a mostly blah top. The finishings (as-drafted) are NOT professional quality (I can't recall any other pattern, ever, that instructs you to tack down seam allowances in order to hide them). My fit issues are numerous and not limited to only this pattern. What would you do? Put a hold on self-sewing for a while? 


Tuesday, June 9, 2015

Mood Board of the Month: Melting Point

By now it should be nice and toasty outside, assuming you live in the northern hemisphere. Enjoy these warm ideas for fun summer sewing!


// Patterns //
These days you can throw a rock and hit three people wearing a jumpsuit. Vogue 9116 carries that vintage 70's vibe, but you could also cut it short for an updated look. You might want a more classic look for the office, but still want to stay cool in the heat. Colette Patterns' Myrtle dress can be made in a knit or woven, giving you lots of options but plenty of work-appropriate coverage.

// Fabrics //
Sticking with our spring color scheme of purple and navy, try this navy cotton jersey, from Organic Cotton Plus, for your jumpsuit. A dark, solid color is a safe bet for a bold style like a jumpsuit. You can definitely get away with a fun pattern on the dress, like this floral knit from Emma One Sock.


This post is not sponsored by any pattern designer or fabric seller. I wish. I just have too much time on my hands and love planning wardrobes! Check out my Mood Board of the Month Pinterest board for all the links to my inspiration. And to those of you who have asked for a tutorial on making these mood boards, I hear ya! Hopefully I'll have one ready for you this month. It's easier than you think!

Thursday, June 4, 2015

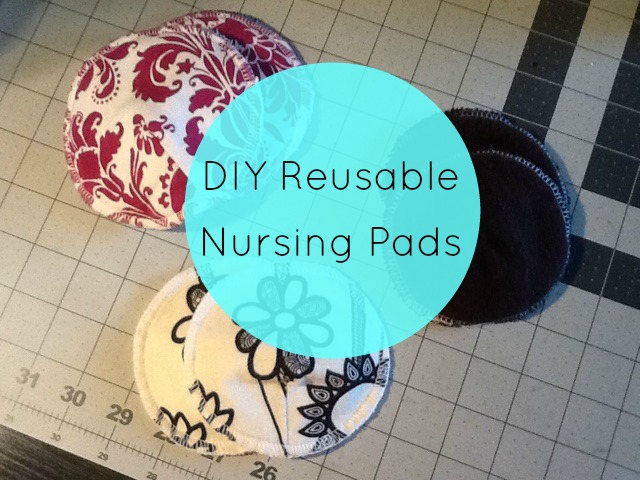
DIY Reusable Nursing Pads

A two week old baby (plus a three year old) doesn't allow for much sewing time, but I have actually managed one small project. Once you become a cloth-diapering mama, you start looking at some of your other disposable items and figuring out which ones can be replaced with reusable versions. I decided to try my hand at making cloth nursing pads. They turned out to be quick and easy and pretty fun to make.


If you start looking to buy these, you'll see that there are two types. One is just a circle, and the other is contoured with a dart. I opted to make ones with darts for a better fit. This would be an even faster project if you went with simple circles.


The standard size seems to be 5" in diameter (see above disposable pad). I recommend tracing your pattern out on to a piece of cardboard, not paper, since you'll be cutting/tracing around it multiple times for just one set of pads. Find a compass to draw your circle, or alternately grab a drinking glass that is the diameter you want and trace around it.


I didn't do anything fancy to calculate my dart, simply copied it from another pattern. I shortened it so that the point of the dart would end about an inch away from the center bust point. It's common practice on any garment that the dart end that far away to avoid a pointy bust.

If you'd rather print a pattern than make your own, Megan Nielsen has a free one on her blog, here.


When it comes to choosing fabrics, what better place to look than your scrap bin? I have a bunch of French terry scraps that I've been using, since the extra loops on terry provide absorbency. Flannel is also very absorbent and an easy fabric to sew, so I've used it for my inner layers. Finally, silky soft organic bamboo French terry has been my last layer, the one closest to the skin. The loops face inward and the knit side faces out. For maximum breathability you want to avoid a waterproof layer, although I imagine wool would work just fine. The amount of layers depends on personal preference. I've been experimenting and it's kind of nice to have a variety of thicknesses. Be sure to use a smooth fabric for the layer closest to your skin; you don't want something fuzzy like flannel sticking to you!


I've found that the easiest way to sew these is in a chain. Sew all the darts without cutting the threads. Simply pull one piece to the back of the machine and start sewing the next. There's a term for this kind of sewing, but my sleep-deprived brain can't quite come up with it. Chain stitching? IDK. Brain synapses not connecting...

I haven't been back stitching, just leaving longish thread tails when I cut them apart.


Trim away the dart to reduce bulk. 


After that, layer up your pieces, aligning the darts, and pin or clip. Send them through your serger to finish the edges. The pads hold their shape better if you sew with the inside face up. Only trim enough to make sure you're catching all the layers. If you've never serged in a circle, it can be a bit tricky. The good news is that nobody will see these pads, so it will be great practice!


Thread your chain under the stitching and viola! You're done! Washable, breathable, pretty nursing pads. 


Free shipping on A Sewist's Notebook ends today! Use code JUNESHIP at checkout. 

Newsletter sign up

.