
NBD, It's only been 85 years since I wrote a blog post. I'll spare you the technology woes and just use the most sensible excuse: 2020 man. To make it up to you, I have not one, but two amazing new projects to show off!
Meg at Sew Liberated teased us with the Arthur Pants pattern for quite a while before it dropped, long enough for me to know I needed it. My elastic-back Winslow Culottes are on heavy rotation, so I knew I would love that feature on the Arthurs. It also made me happy that I could reduce the appearance of bulk on the front by installing a flat waistband and pleats, rather than gathers. Though harder to sew (due to the zip fly) it's worth it to me for a smoother silhouette.

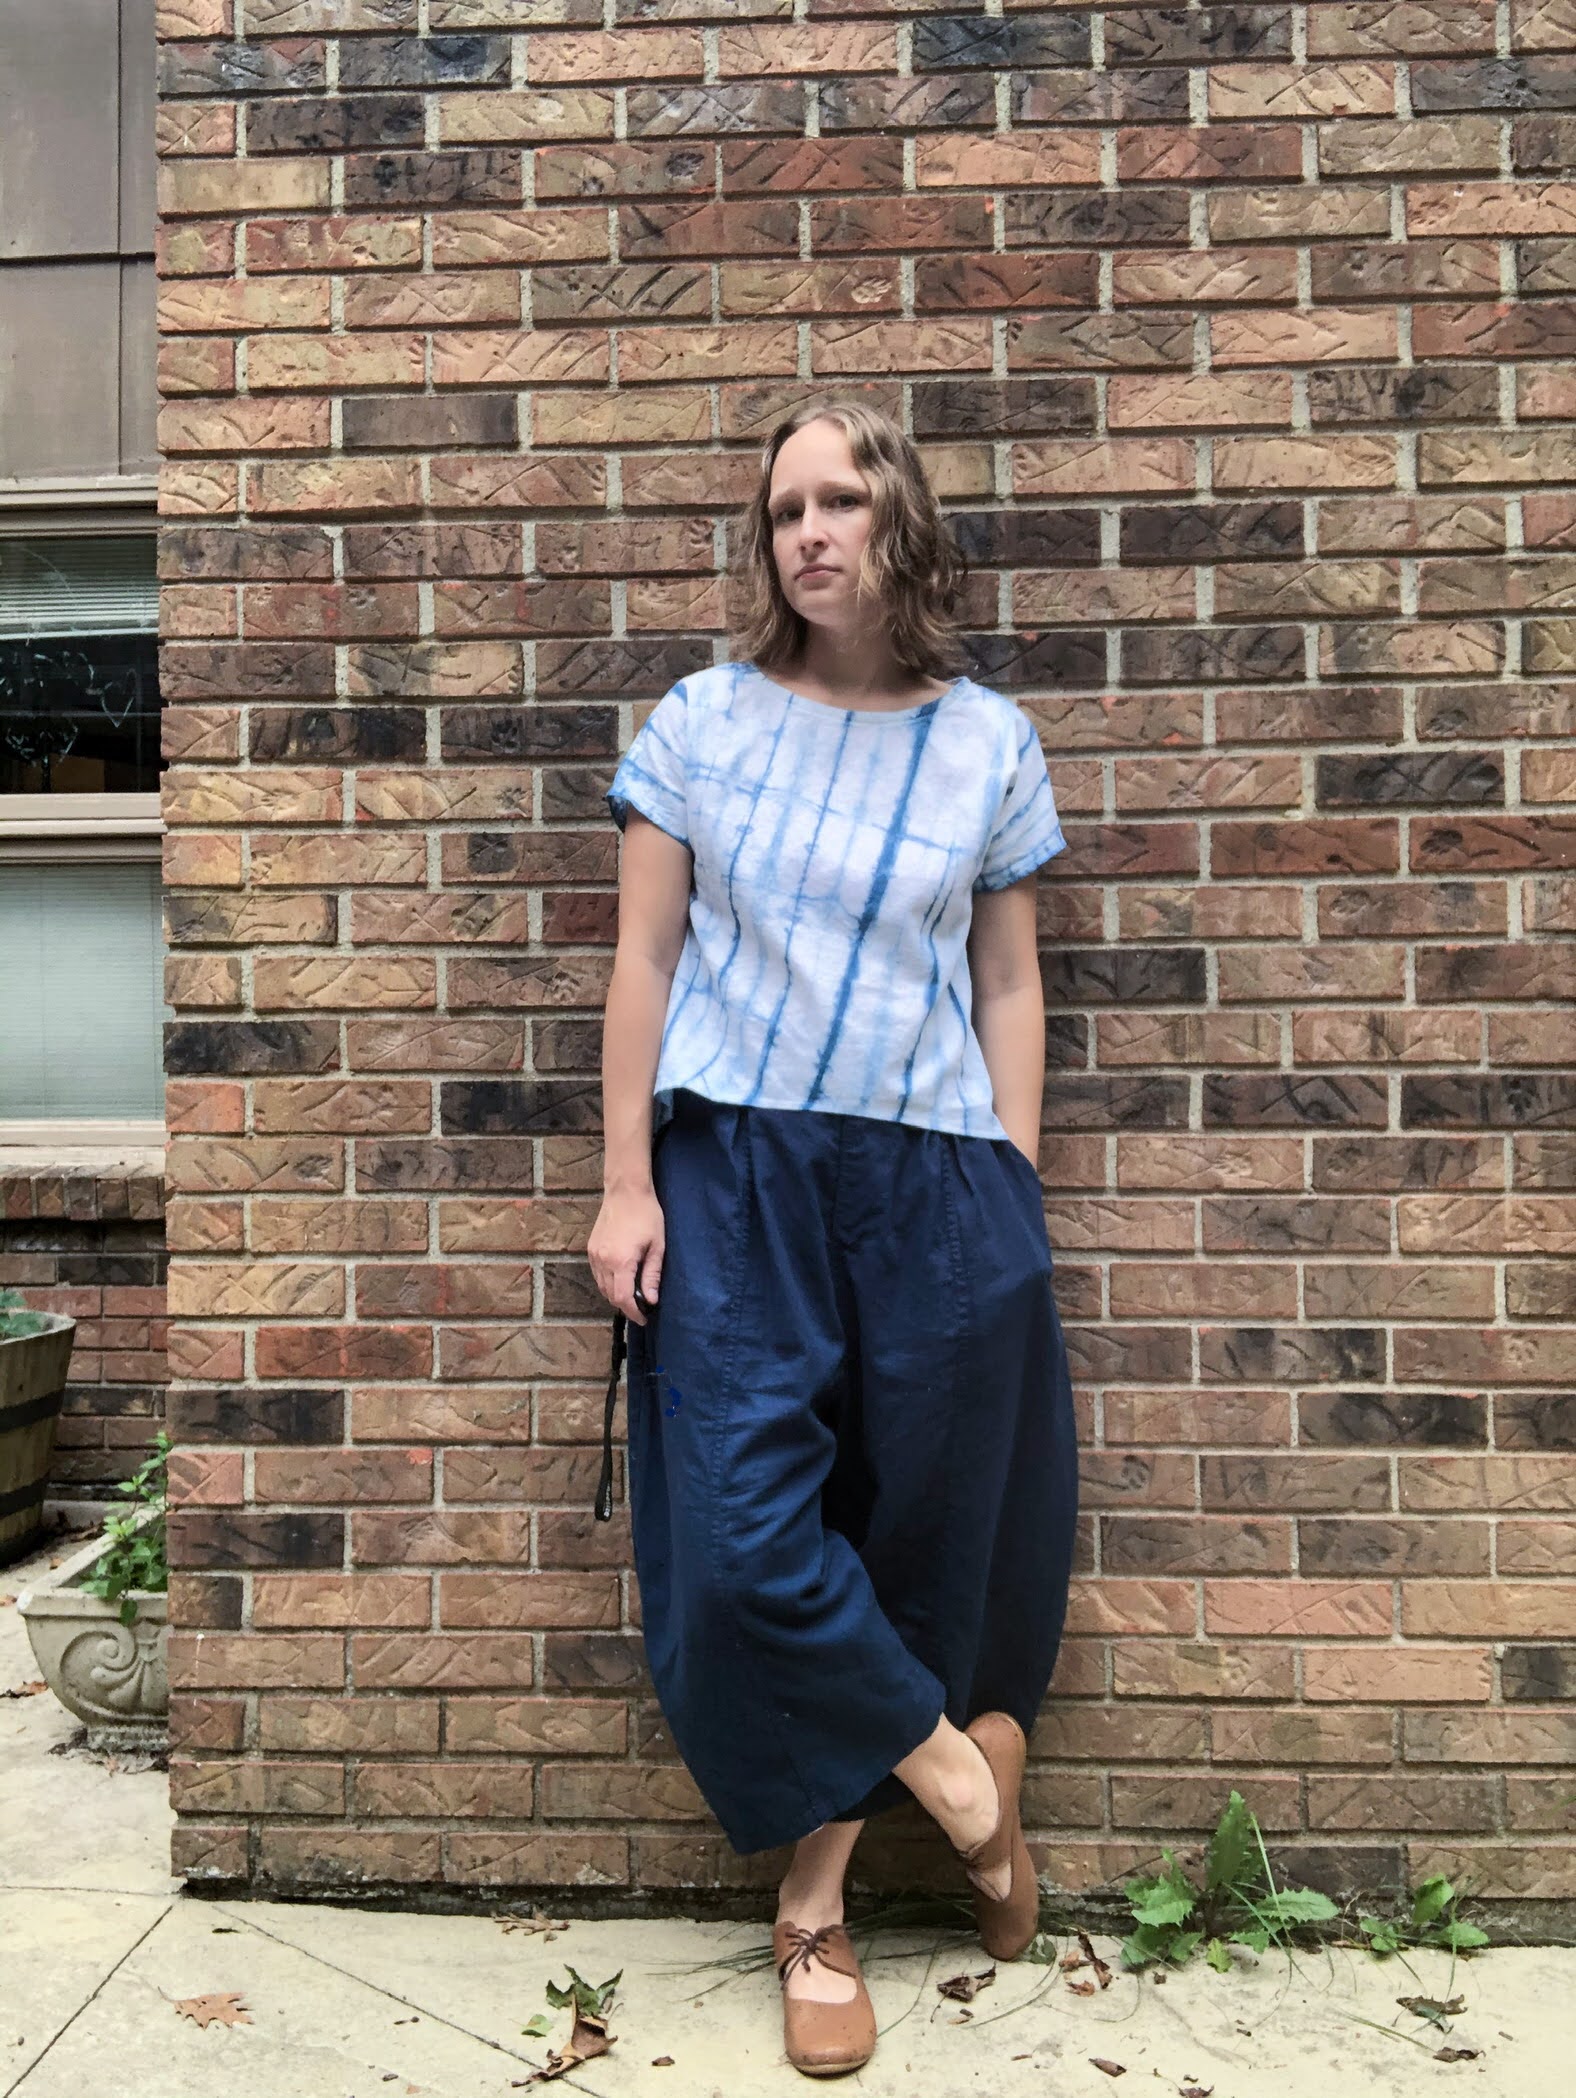
The most distinguishing feature of these pants is their balloon-leg shape. Reminiscent of MC Hammer's famous pants, it works much better with linen instead of that scary glittery polyester of the 90s. Speaking of linen, this beautiful navy fabric is from fabric.com and it's exactly the color I wanted. It's actually a linen/cotton blend, which made it kind of sticky feeling. It's hard to describe any other way, except to say that pet hair sticks to it like crazy.

I made a size 8 to go with my 38" hips. Many of the tester versions featured a cropped leg, which I felt was more flattering. I was disappointed to find that a cropped length was NOT included in the pattern. Normally, I wouldn't be concerned about shortening length, but I did not want to wreck the silhouette. The pattern did include finished garment length, which helped me figure out that I needed to remove 6". The pattern is drafted for 5'7" and I am 5'4". I removed 3" from the hem and 3" from the Lengthen/Shorten line. It did not fold out neatly and I wasn't sure how to true the lines. I ended up shifting the bottom portion of the leg towards the outseam in order to preserve the balloon shape.

Other than that, out of the metaphoric envelope the fit is excellent. The elastic is super tight in the back but the front lies flat. I used a hoarded four leaf clover button from Arrow Mountain for the closure. Looking at these photos, I think I need to move the button over a touch to make the fly meet in the middle the correct way.

The back isn't super flattering (I feel like square pockets rarely are) but again, for comfort and style I'm willing to accept it.

This pattern took much longer than anticipated to put together, due to French seams, flat felled seams, and a fly zip. You almost have to pay me to sew flat felled seams, I dislike them that much. But, I felt it was in the spirit of Sew Liberated and slow fashion to do them as instructed, so I did. It does turn me off from making the pattern again in the same way. Also, how many Hammer Pants do I need?
And in case you missed it, I made a fantastic video of myself doing the Hammer Dance. I have such good moves, I should've been a dancer.

The second part of this outfit is a hand-dyed Strata Top (also from Sew Liberated). The fabric started as an undyed linen/rayon blend from Dharma Trading Company. I previously dyed this exact fabric at the Maker's Retreat last year, and ordered five yards of it for my own dyeing purposes.
I made a quick muslin of the Strata to check fit and then went ahead and sewed it up totally undyed. After the top was done, I got my indigo vat ready, wet the shirt, folded it, and started dipping.

There was a lot of trial and error, dumped out vats, failures, and frustration before I ended up with an indigo vat that worked. I used all natural ingredients for my vat (google the 1-2-3 indigo vat method for more info). Needless to say, unfolding this top and seeing that the dye job worked was an amazing feeling! There is something quite magical about the process. I'll surely go into more in a later blog post.

I love it when two patterns from the same designer go together as well as these two. This is such a fun look but also comfortable!