
Tailoring the Oslo Coat
My journey of hand tailoring seemed to be filled with innumerable choices. Which interfacing? Which thread? How exactly does pad stitching work? Some of my choices were successful, some less so. This post will detail all those intricacies and my advice on what worked, and what I'd do differently next time.
What is hand tailoring? First, hand tailoring does NOT mean sewing entirely by hand. Hand tailoring means shaping the pieces of the coat or jacket using hand sewing stitches. It means sew-in interfacing instead of fusible. It means inserting the lining by hand. It probably means a lot of other things, but that's the high-level summary.
Almost every piece of my pattern had some sort of hand work to it, whether it was sew-in interfacing, pad stitching, or both. I also added sleeve and back stays (a stay is a piece of lightweight woven fabric meant to reduce tension and stress on the main fabric). For the sake of simplicity, I will go through each piece one at a time.
FRONT BODICE

Once the large piece of interfacing was catchstitched down, I sewed the roll line tape on top of it, also using catchstitches. That leads me to my second lesson: hand tailoring is much easier with a busy, textured fabric. I was using black silk thread for all my hand stitches, and it blended in SO well with this fabric. I do not have the skills to make invisible stitches on a flat, thick coating with no depth to it.
Next came the pad stitching. I watched many videos, I marked all my lines, I removed the lines (a heat-disappearing pen works amazingly for this task!) I remarked them, I pad stitched badly for a while...basically, it took practice. Much like all of sewing! The purpose of pad stitching is to allow your hands, needle, and thread to shape the fabric in a curve. Fusible interfacing does not give the same flexibility.
Having done all this pad stitching, I can say I doubt I'd do it again on a shawl collar. I believe I had more success shaping the fabric with steam and my iron than I did with needle and thread. But take my words with a grain of salt, this was my first time using these methods and it's possible I just did them badly!
Padstitching done, it remained to interface the center front, which I chose to do with fusible interfacing (I used knit fusible because it seemed the best weight of what I had on hand). This portion needed reinforcement only for one buttonhole.
Finally, I hand basted heavyweight, bias-cut rectangles of hair canvas 1/2" up from the hem. This was a change from my pattern, which called for the interfacing along the bottom edge. I moved it up the 1/2" to keep it from the seam allowance. I chose heavyweight, versus the lightweight I used in other areas, to give the hems weight and crispness.
FRONT FACING
This is the portion of my tailoring journey that generated the most questions. The books I consulted didn't seem to remember that facings existed. There were no directions about interfacing or pad stitching them. The vague, general consensus was that facings were often not interfaced at all, however, my pattern called for interfacing the entire front facing.

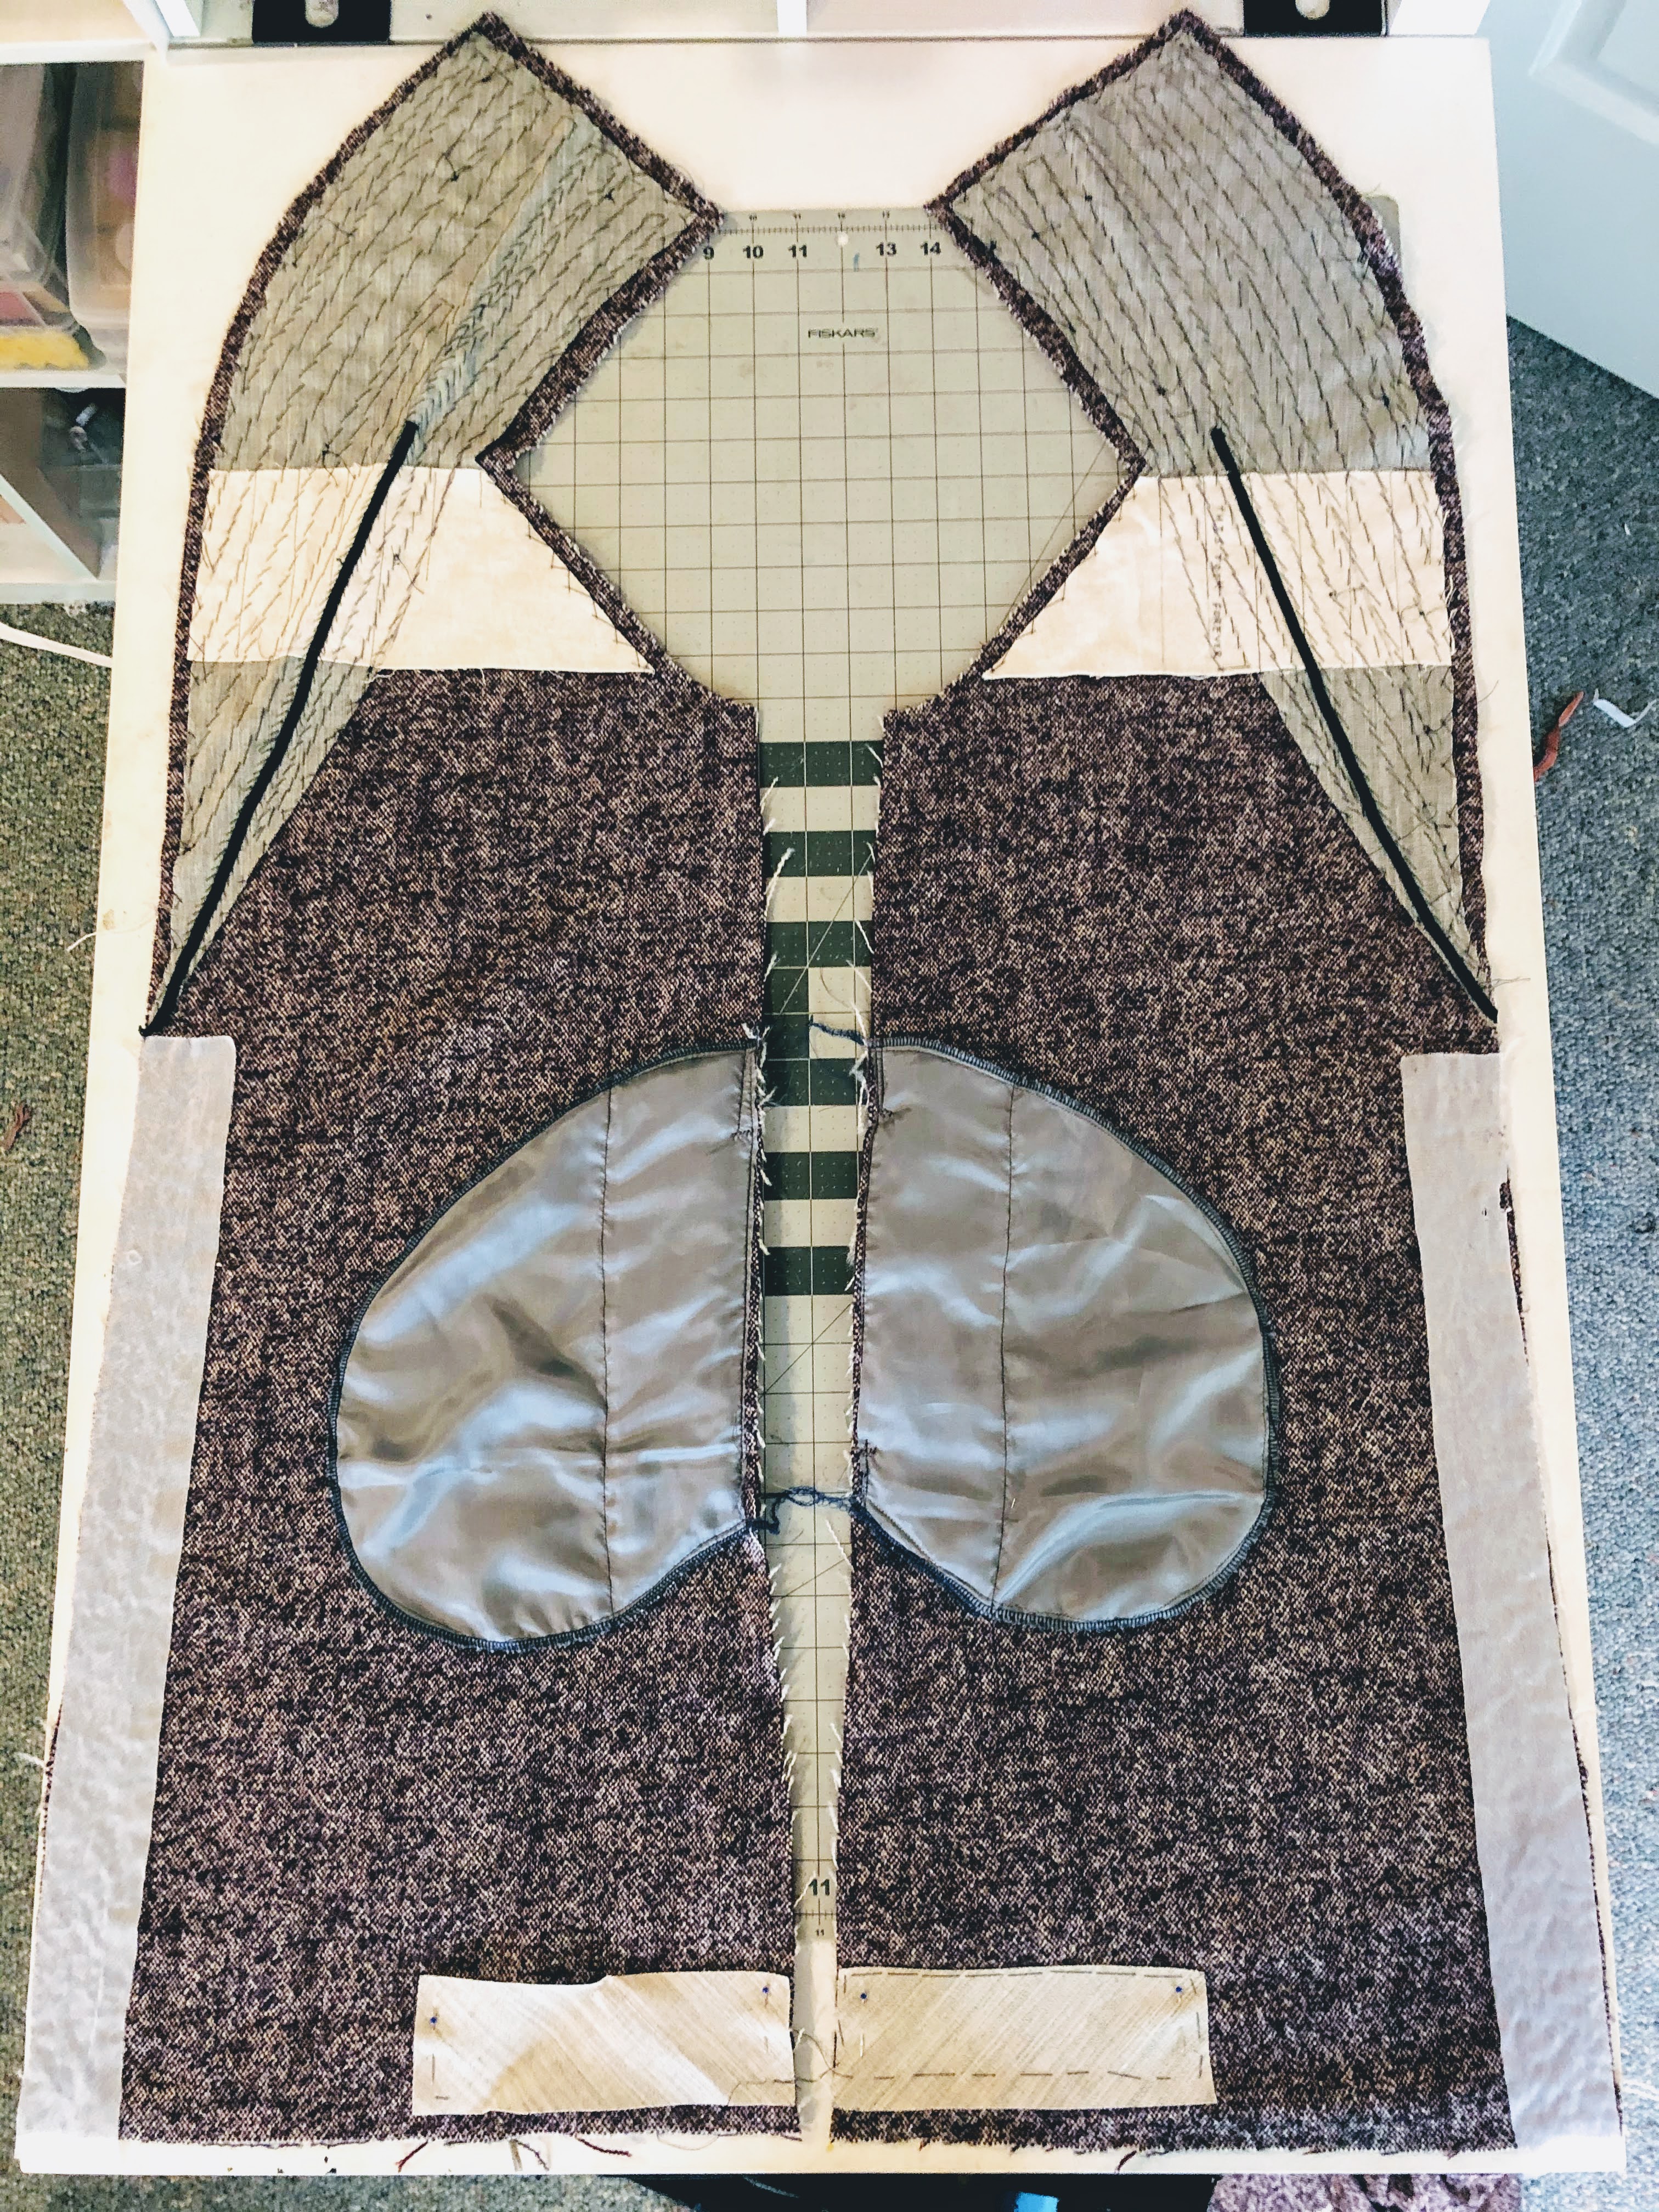
Again, I cut my lightweight, sew-in interfacing to size, and then trimmed 1/2" from the edges, with the exception of the edge where the facing would be sewn to the lining (in this photo, it is the edge in the center of the mat). I felt that if any edge needed reinforcement, it would probably be that one. Again I catchstitched the edges to the outer fabric. I decided, based on nothing really, to tape the roll line of the facing. I did not do any pad stitching (you can see one row of it above, but that was mostly because I had thread left on my needle after sewing down the tape).
As I mentioned before, the roll line was not marked on my pattern. Again I had to lay my pieces together and transfer the roll line from the front piece to the facings. More guessing. In the end, I wish I would not have done this step, I think the collar would lay better without two taped lines trying to match up. Lesson three: do not pad stitch or shape the front facing.
BACK
The back of the coat did not call for interfacing except at the hem. I opted to include a back stay. I drafted it myself and it is cut from regular muslin with the bottom edge finished with pinking shears. The stays DO extend into the seam allowance for extra reinforcement.

The bottom of the coat also has a strip of bias cut, heavyweight hair canvas, like the front of the coat. In the above photo it is only pinned on, but I did end up basting it by hand. I also removed 1/2" on each short end so that it would not be sewn in the side seam.
SLEEVES
This coat has a two-piece raglan sleeve, both pieces shown below. I created a sleeve stay, just like I did with the back stay. Since it's a two-piece sleeve it did mean drafting two different shapes.

The sleeve hems also have heavyweight interfacing, 1/2" up from the edge. These pieces I did NOT cut on the bias, as one of my books said it was optional and I couldn't imagine wanting my sleeve hems to stretch. Again, this was sort of an experiment, and in the end I think the sleeves would have a more natural shape if I had cut the interfacing on the bias. They are pinned on in the above photo, but I hand-basted them after removing 1/2" from the short ends/seam allowances.
BACK NECK FACING
This piece called for interfacing, and I hand basted in the lightweight sew-in hair canvas, removing 1/2" from the top portion to reduce bulk. I would definitely repeat this process for a back neck facing. I always have trouble fusing and neatly sewing curved pieces like this, and hand sewing gave me much more control and accuracy.

BOUND BUTTONHOLE
I have never made a bound buttonhole before, but since there was only one it seemed like a good time to try. It is similar to welt pockets, which I've done.

I made a practice buttonhole in identically fused fabric. It was successful, I liked how it looked on the outside, but I couldn't understand the directions (from my various sewing books) about finishing the back. My tailoring book essentially said to slash the front facing and hand sew the flaps under! In other words, the lips are only made through the outer fabric. I'll be honest, it killed me to slash into my almost finished coat and just tuck in the cut edges. In a less textured fabric it would look like absolute garbage. It's a nice finish from the outside, but I don't think I'll do it again.
RAGLAN SHOULDER PADS
Never thought about the existence of raglan shoulder pads? Yeah me neither. But there is a difference! A raglan pad is the same as a regular shoulder pad, except with an extra extension to prevent further collapse down the arm.

I had purchased regular should pads and could have just added on to them, but I decided to save them for my next coat project. I ended up making my own pads. I used a pattern from Closet Core Files and made up the raglan portion. They are NOT pretty, but it was a good exercise. Mine are made from heavy weight flannel, lightweight interfacing, and a variety of thick felted wool sweater scraps. Not being a quilter, I had no batting on hand. It would've been easier to use batting instead of sweaters.
In the end, I'm not sure the pads were necessary. I can barely see a difference and the pattern wasn't drafted to include them. I have narrow shoulders, so I'll take all the extra I can get, but I won't be making my own again and may never use raglan ones.
LINING
Okay, confession time. I have read SO many blog posts where someone says they inserted their lining by hand. I admit, I had no idea what that actually meant, except that maybe they just sewed the seams by hand. I didn't understand the why or even really the how. I finally stumbled on the process in one of my books. Essentially, the lining is basted into the coat by hand, fiddled with until it works, and then slipstitched together by hand.
To my estimation, a dressform was a vital component of this process. The coat needs to be turned inside out, to be placed on a dressform, and then hand stitching and adjusting done as needed. I do not have a dressform. I inserted the lining by machine and bagged it out through an opening in the sleeve lining, just as my pattern recommended. It was a million times faster and I had no problem obtaining a nice result.

So there you have it! That is my long, exhausting trip through hand-tailoring a wool coat. I hope this was helpful and please drop any questions if you have them! Make sure to check out my other posts about the Oslo, covering supplies and a general review.


You did really well at merging pattern instructions with more general ones. Congrats on getting some practice in with the padstitching. And you're right that putting in the lining by hand doesn't have much obvious advantage. The lining benefits most from being cut slightly differently, not from the actual stitches. And it was very good of you to add the stays, I have found that they add a lot of longevity to a coat.
ReplyDeleteThe hem interfacing is cut on the bias not so it can stretch, but so it rolls more softly and evenly. Interesting here that you can compare the finished effect of both methods in one garment. There are 2 places where I might have done things differently. One is I would have kept the chest shield out of the collar, just ended it at the roll line, because stiffening the collar in a middle band like this doesn't do anything for it. The other one is to not do anything to the roll line on the facing. The purpose of taping the roll line on the body is to keep it close to the chest and unstretched, without actually gathering but drawing it in. If you do the same on your facing, you are fighting against that desired effect. The facing should be softly expanding outward over the roll line, not drawing into it, which is also why the pattern didn't have you interfacing it.
But on the whole this was a long arduous project with great results 😁. I totally second your excellent advice to use tweedy fabric to disguise construction artefacts too. You will be wearing this happily for years to come!
Thank you so much for this information, I'm delighted I found this! I just cut and tweaked an Oslo muslin and am about to cut my fabric, so knowing what you did (and what you won't do next time) is so, so helpful. Thank you!
ReplyDeleteThis is so helpful! I have my main fabric cut out and was thinking about adding padstitching for the collar - something I've never done before - but based on your experience I will save myself the time and effort. Thanks for writing such a detailed post!
ReplyDeleteI'm glad I did it just for the experience, but I'm not sure it added anything to the project haha!
Delete