
How to Alter a Jeans Waist
When I do alterations for clients, I always tell them that there are two ways to do something--the quick and dirty way, or the right way. They're paying me by the hour, so I give them a choice for how they want me to work. The right way always takes longer. Today, I've got a tutorial on how to alter jeans around the waist, the right way.

Full disclosure, I got requests for this tutorial after the fact, so there are not nearly as many photos as I would normally have for a full tutorial. I only snapped a few in progress pictures to make an Instagram Reel. I will explain what I did in as much detail as possible, but if you're a visual learner I apologize!

It's rare for me to buy anything ready to wear, but I make exceptions for fabric types that I can't buy myself. The current style of light-wash mom denim, particularly in a stretch fabric, is nearly impossible to find in yardage. So, I picked up these jeans (second hand) that originally were from American Eagle. They were a size 10 and fit okayish in the hip, but not at all in the waist. I loved the color, and the fabric was super soft since it was a cotton/modal blend (with spandex and a touch of polyester). I decided that for $17 I was willing to take the chance on a full blown, "right way" alteration.
The bulk of this project was seam ripping. Please make sure you're buying fresh seam rippers regularly, because they do go dull! I get mine in bulk from Wawak.
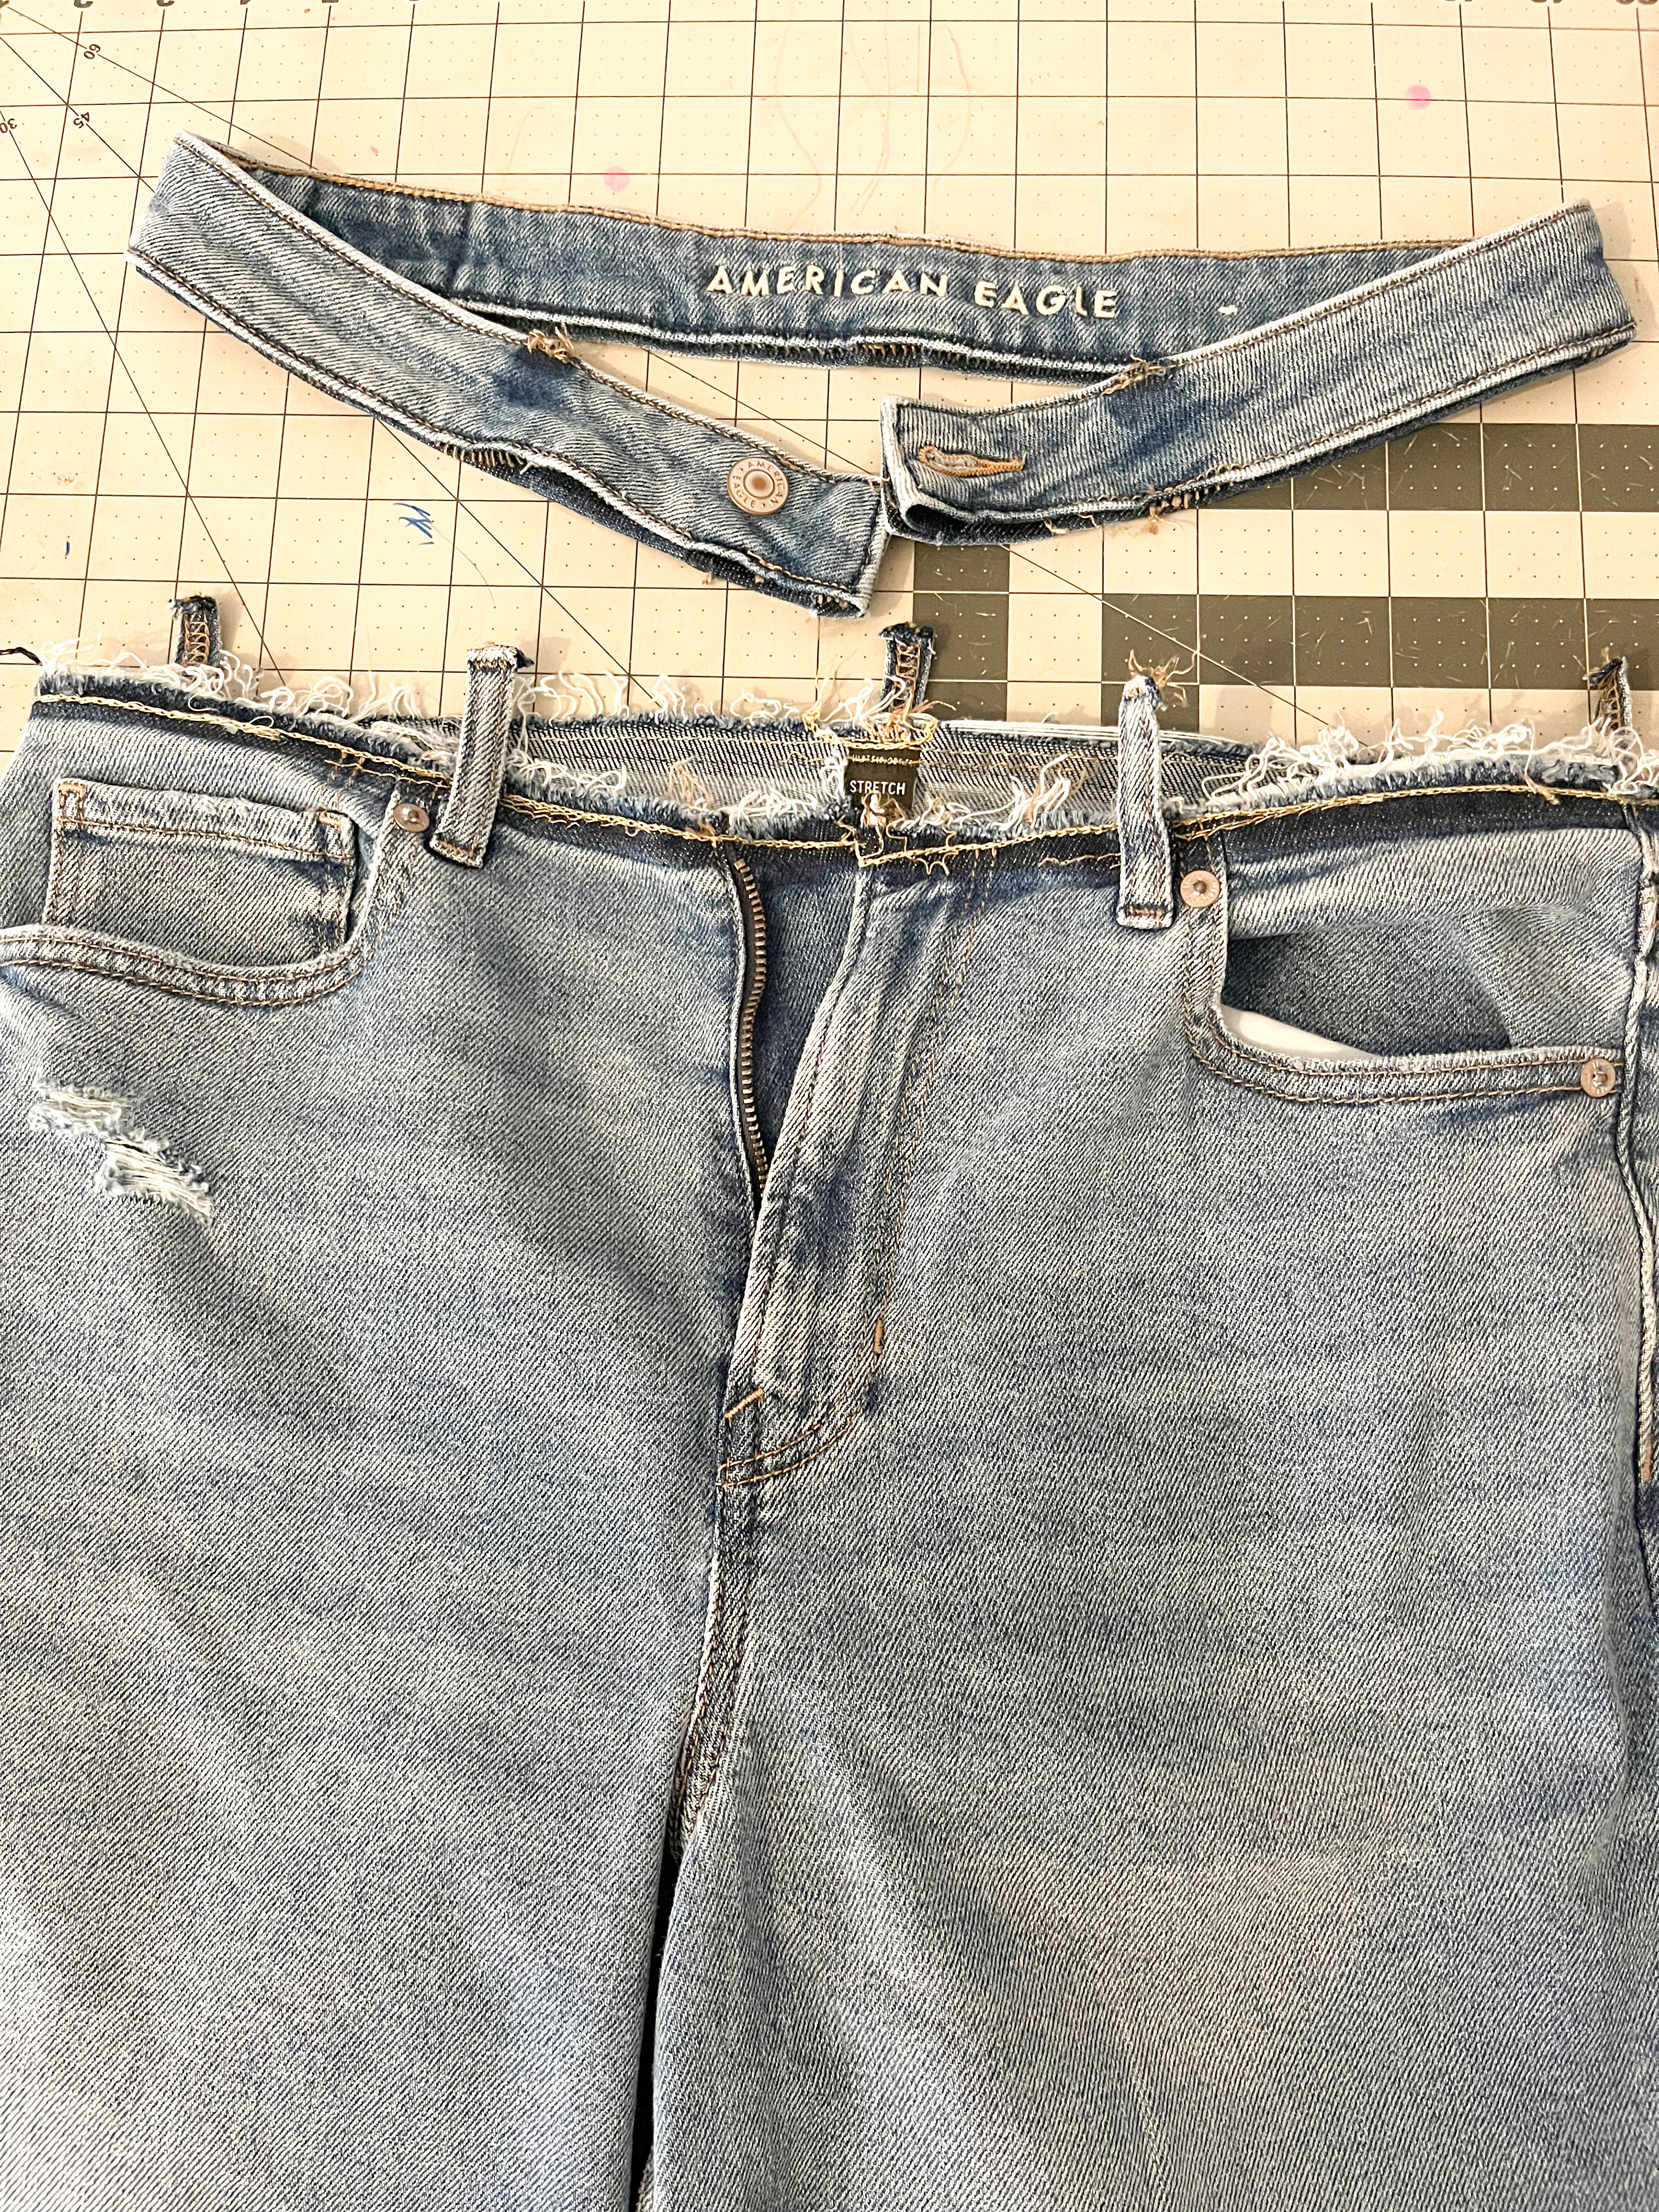
The first step is to remove the waistband. If there is a leather patch on the back, you'll need to take that off. Next, I started picking out the front topstitching near the zipper, and after a few inches the rest pulled away. It was sewn with a chainstitch (here's some info on a chainstitch) which means it was looping and ripped out easily once started. After that, I had to unpick the seam allowance inside the waistband, where it had been sewn to the top of the jeans. Last step on the waistband was to rip out the stitching where the top of the belt loops had been sewn into the waistband. I left the bottom stitching on the belt loops. I did need to completely remove one belt loop at center back, but set it aside for reattaching later.

Waistband removed, I could now start working down the vertical seams. First was the topstitching along the side seam, next to the pockets. This stitching is a pain to rip out, it ends in a bartack, but luckily it's short. With the topstitching gone, you can then open up the side seams. On my jeans, the seam allowances on the sides were finished separately, so I did not have to rip any serging.
Next it was time to tackle the center back seam. On jeans, this is typically a flat-felled seam. You will need to rip out the topstitching and then separate the seam. I opted to open this seam all the way to the crotch, although I've also ripped it out halfway in the past. Just depends on how much tailoring you need along the bum.
Now comes the trickiest part, tailoring the pants to fit your body using the newly opened seams. This part is much easier with a helper, but I managed on my own. I put the jeans on and held them where I thought they should sit (hard to do exactly because the waistband is missing). I started pinching out fabric along the side seams and the center back seam to get an idea of how much to remove, and where.

Because I did not want to move the back pockets, I was limited on how much I could take out of the center back, so I started there. You can either pin it, or baste it, or even lay another pair of jeans on top and trace the crotch curve. The most important thing is to line up the topstitching/seams along the yokes. I have a slight swayback, so I ended up taking out a pretty decent chunk starting at the waist and tapering to nothing all the way down at the crotch.
Be kind to yourself, this is a fiddly process and it will take some trial and error!
Once I had the center back seam basted where I wanted it, I moved on to the side seams (already done in the above photo). Again there was trial and error here, but you want to make sure you're working each side evenly. If you don't, the front pockets will end up being two different sizes! Also make sure you don't end up sewing the pockets so small that you can't fit your hand inside.
The annoying part about narrowing the side seams were the pocket rivets. If you look at the photos, they disappear between the before and after. I removed so much that the rivets became a part of the side seams. I had to cut them off and then try to finish the seam allowances neatly.
Once again, I removed a pretty decent chunk from the side seams, starting at the top and tapering to nothing somewhere below the pockets.
Keep trying the jeans on and making adjustments until you're happy. Sew the seams permanently. On the side seams, I finished the seam allowances with my serger. Then I pressed them to the back and restored the vertical topstitching next to the pockets, just like in the original jeans.
Next, I sewed a faux flat felled seam on the center back. To do that, serge the seam allowances and press them to one side. Topstitch from the outside.
With all your vertical seams restored, it's time to shorten the waistband to fit the smaller opening you've created.
There are a couple ways to shorten a waistband. You could cut it in three places, just like you did with the pants (side seams x2, center back seam). I opted to cut it only at center back. I basically removed the entirety of the embroidered "American Eagle" wording. Once you've chosen where to remove fabric and put new seams, you'll need to slightly open up the waistband topstitching around your cut. You need to be able to put the waistband outer right sides together, AND the waistband inner right sides together, to sew new seam(s).
Again, trial and error. I pinned the waistband back on in the places where it wasn't cut, then sort of pinched out at the back. You could certainly measure and sew a matching waistband, but again my slight swayback means I sometimes need the waistband to be even narrower than the top of the pants.
I ended up fixing the waistband with a cheater method. Rather than continuously pinching and sewing and resewing, I tucked one cut end under the other and turned in the raw edge. It got bulky, but a couple whacks with a hammer and the bulk behaved. I was able to hide any imperfections by placing a belt loop over it.

Waistband pinned/basted together, I used the seam allowance from the inner waistband to sew it back onto the pants. Once that was done, I tucked everything neatly into the waistband, pinned well, and sewed topstitching all around the waistband in order to secure everything. This is also a good time to put those belt loops back and secure the tops at the same time that you're topstitching.

If you want, you can put the leather patch back on. I accidentally ripped mine (it was more like paper than leather) so I didn't put it back.

I am THRILLED with how the alterations turned out on these jeans! It was a lot of work, but I didn't have to cut out fabric, hem, or put in a zipper, so still less work than making them from scratch. Since it's a stretch fabric I don't mind the high waist like I normally do. And they look cute with crop tops!
Questions? Comments? Again, I know there aren't a ton of photos, so ask away if you need help!


Comments
Post a Comment
I would love to hear from you! Please feel free to comment below.